Executive Summary
Reconstituting a lyophilized peptide is the single most important step between purchasing a research compound and using it correctly. Get it wrong, and you can destroy an expensive vial in seconds. Get it right, and you'll preserve potency, ensure accurate dosing, and minimize contamination risk for weeks of use.
Key Takeaways
- Always use bacteriostatic water (not sterile water) for multi-dose peptide vials - the 0.9% benzyl alcohol preservative inhibits bacterial growth for up to 28 days
- Add water slowly down the vial wall; never spray directly onto the powder or shake the vial
- The universal dosing formula: Dose volume (mL) = Desired dose (mcg) / Concentration (mcg/mL)
- On a U-100 insulin syringe, 1 unit = 0.01 mL, so multiply your mL dose by 100 to get units
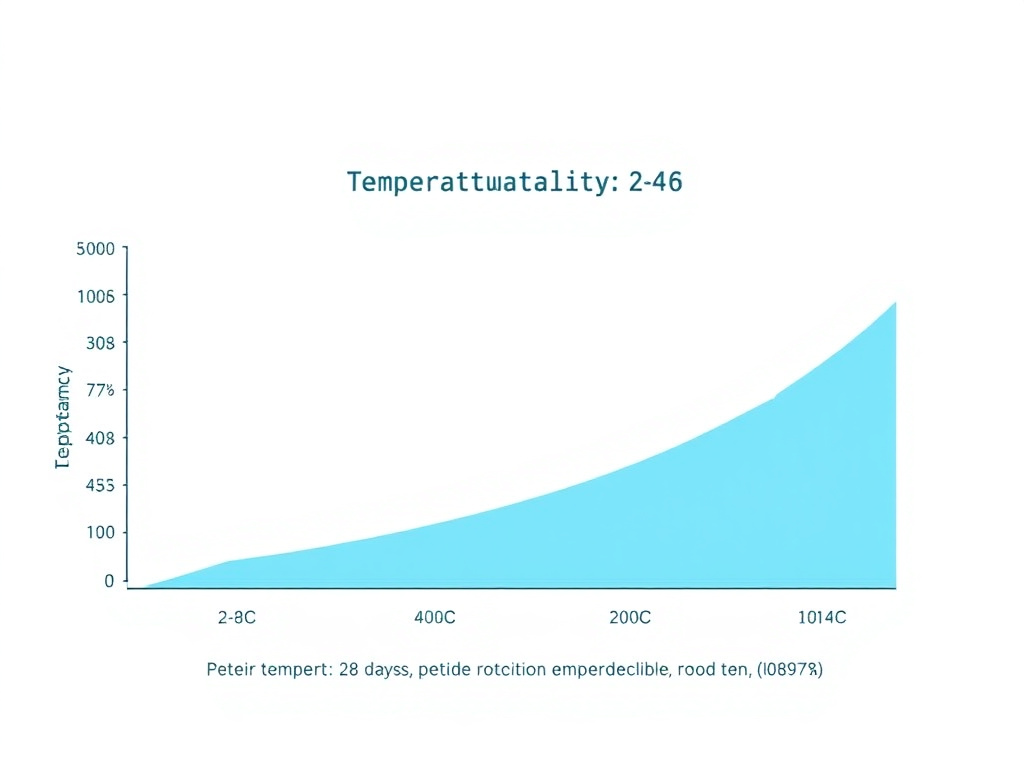
- Store reconstituted peptides at 2-8 degrees C and use within 28-30 days
This guide covers everything you need to know about peptide reconstitution from start to finish. We'll walk through the science behind lyophilization (freeze-drying), explain why bacteriostatic water is the standard solvent for multi-dose vials, and provide a detailed step-by-step reconstitution protocol you can follow with confidence. You'll also find complete dosing math with worked examples, injection technique guidance for subcutaneous and intramuscular routes, syringe and needle selection charts, storage rules, common mistakes that ruin peptides, and compound-specific reconstitution notes for popular peptides like BPC-157, semaglutide, tirzepatide, and growth hormone secretagogues.
Whether you're a clinician prescribing compounded peptides, a researcher setting up a bench protocol, or a patient who has been handed a vial and a syringe with minimal instruction, this resource is designed to fill the gaps. Peptide therapy has grown rapidly over the past several years, yet reconstitution and injection technique remain poorly taught. Most peptide vendors include a one-paragraph instruction sheet at best. That's not enough when you're dealing with fragile biological molecules, sterile technique requirements, and dose calculations that involve unit conversions most people haven't done since chemistry class.
The stakes are real. Inject too much water and your doses become impractically large. Inject too little and you can't measure small doses accurately. Shake the vial and you'll denature the peptide. Use sterile water instead of bacteriostatic water in a multi-dose vial and you've created a bacterial growth medium. Store at room temperature and degradation accelerates dramatically. Each of these mistakes is common, and each one is preventable with the right knowledge.
We've structured this guide to work both as a start-to-finish tutorial and as a reference you can return to for specific questions. Use the table of contents above to jump to any section. For quick dosing math, check the FormBlends Dosing Calculator - it handles the arithmetic automatically and accounts for different vial sizes and syringe types.
Key Takeaways
- Always use bacteriostatic water (not sterile water) for multi-dose peptide vials - the 0.9% benzyl alcohol preservative inhibits bacterial growth for up to 28 days
- Add water slowly down the vial wall; never spray directly onto the powder or shake the vial
- The universal dosing formula: Dose volume (mL) = Desired dose (mcg) / Concentration (mcg/mL)
- On a U-100 insulin syringe, 1 unit = 0.01 mL, so multiply your mL dose by 100 to get units
- Store reconstituted peptides at 2-8 degrees C and use within 28-30 days
- Rotate subcutaneous injection sites and use 29-31 gauge insulin syringes for maximum comfort
Throughout this guide, you'll find references to peer-reviewed research, WHO injection guidelines, and USP standards. We've included over 30 citations so you can verify every claim and dig deeper into the primary literature. For broader context on peptide science, visit the FormBlends Peptide Hub or explore the Science section for compound-specific research summaries.
Let's start with the fundamentals: what exactly is a lyophilized peptide, and why does it need to be reconstituted in the first place?
Understanding Lyophilized Peptides
What Is Lyophilization?
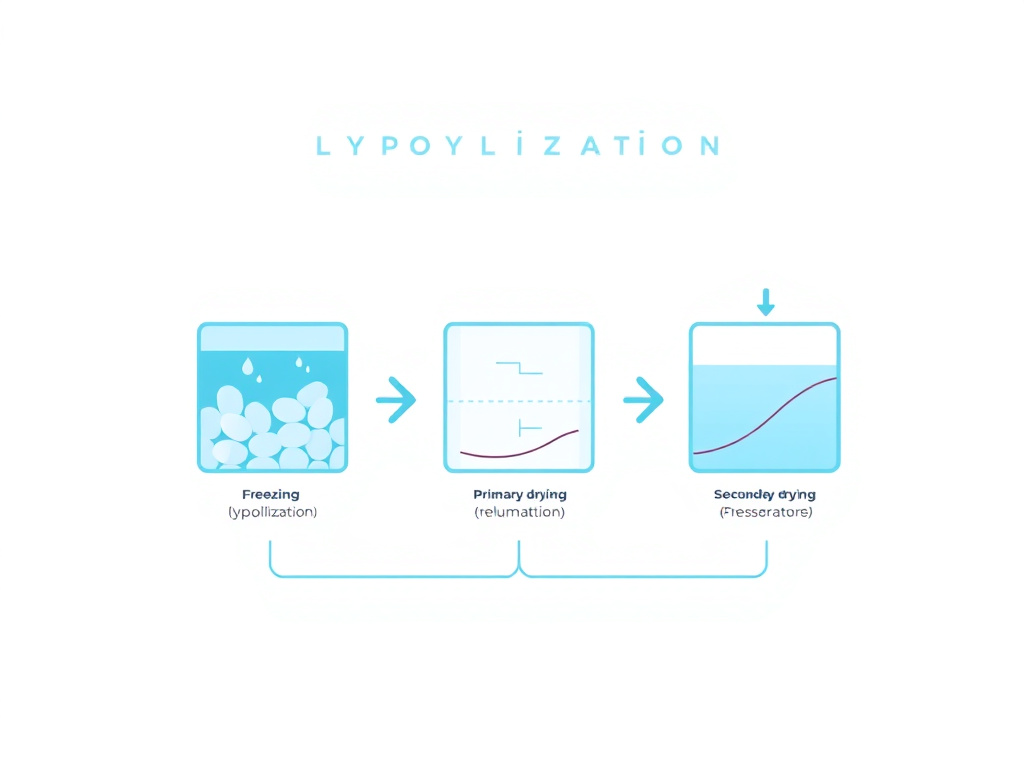
Lyophilization, commonly called freeze-drying, is the gold standard preservation method for peptides, proteins, and many other biologics in the pharmaceutical industry. Approximately one-fifth of the top 100 pharmaceutical products are freeze-dried, and for biologics specifically, that figure climbs to nearly half (Franks, 1998). The process removes water from a frozen sample through sublimation under vacuum, producing a dry, porous solid - often described as a "cake" or "puck" - that resists the chemical degradation pathways responsible for most peptide instability.
The science behind lyophilization involves three distinct phases. During the first phase, freezing, the aqueous peptide solution is cooled to approximately minus 40 to minus 80 degrees Celsius. Ice crystals form, concentrating the peptide and any excipients into an amorphous or crystalline solid matrix between the ice structures. The rate of freezing matters: slower freezing produces larger ice crystals with more efficient sublimation channels, while faster freezing yields smaller crystals and a more uniform cake structure (Tang & Pikal, 2004).
The second phase, primary drying, is where the actual freeze-drying occurs. The chamber pressure is reduced to well below the triple point of water (typically 50-200 mTorr), and gentle heat is applied to the shelves. Under these conditions, the ice sublimates directly from solid to vapor without passing through a liquid phase. This is the critical distinction from regular evaporation - because the water never becomes liquid during removal, the peptide molecules remain trapped in their native conformation within the solid matrix rather than being subjected to the shearing forces, surface denaturation, and chemical reactions that occur in liquid water. Primary drying typically takes 24 to 72 hours depending on the fill volume and formulation.
The third phase, secondary drying, removes residual unfrozen water that remains bound to the peptide and excipient molecules. The shelf temperature is raised further (often to 25-40 degrees C) while maintaining vacuum. This phase reduces the moisture content of the final product to 1-3%, which is low enough to provide long-term stability. Most degradation reactions in solid-state peptides follow Arrhenius kinetics and are strongly moisture-dependent - even a few percentage points of extra moisture can dramatically accelerate decomposition (Pikal et al., 1991).
Why Peptides Are Freeze-Dried
Peptides in aqueous solution are vulnerable to several degradation pathways that lyophilization essentially halts. Understanding these pathways explains why your peptide arrives as a powder rather than a ready-to-use liquid.
Hydrolysis is the primary enemy. Water molecules attack peptide bonds directly, cleaving the amino acid chain into fragments. The rate of hydrolysis depends on pH, temperature, and the specific amino acid sequence, but it's always present in aqueous solution. Certain residues are particularly susceptible: asparagine (Asn) undergoes deamidation, and aspartate (Asp) residues are prone to isomerization - both reactions require water as a reactant (Stephenson & Clarke, 1989). By removing water, lyophilization eliminates the substrate for these reactions entirely.
Oxidation is the second major concern. Dissolved oxygen in aqueous solutions attacks methionine (Met), cysteine (Cys), tryptophan (Trp), and histidine (His) residues. Methionine oxidation to methionine sulfoxide is especially common and can significantly reduce biological activity (Li et al., 1995). In the dry state, oxygen diffusion is dramatically slowed, and the absence of water prevents many oxidation-mediation reactions from proceeding.
Aggregation occurs when peptide molecules unfold and stick together, forming dimers, oligomers, or larger insoluble aggregates. In solution, thermal energy and molecular motion constantly promote these intermolecular interactions. Aggregation is particularly problematic for larger peptides and proteins, but even small peptides can aggregate at the air-water interface during storage, especially when solutions are agitated (Mahler et al., 2005). Lyophilization locks individual peptide molecules in place within the solid matrix, preventing the molecular collisions that drive aggregation.
Microbial contamination is a practical concern for any aqueous pharmaceutical. Water supports bacterial and fungal growth. A peptide solution without preservative at room temperature is an invitation for microbial colonization, which can produce endotoxins and other dangerous contaminants. Lyophilized powders, with moisture content below 3%, cannot support microbial growth.
Data from stability studies demonstrate the magnitude of these effects. Research published in the European Journal of Pharmaceutics and Biopharmaceutics showed that lyophilized peptides retained greater than 95% purity after 24 months of storage at 2-8 degrees Celsius. The same peptides in aqueous solution dropped to 85-90% purity within just six months under identical temperature conditions (Constantino & Pikal, 2004). This five-fold difference in shelf life is why virtually all peptide products ship as lyophilized powders.
What the Cake Looks Like
When you receive a lyophilized peptide vial, you'll see a white to off-white solid - sometimes as a compact puck at the bottom of the vial, sometimes as a loose, fluffy powder. Both appearances are normal. The structure depends on the formulation, fill volume, and specific lyophilization cycle used during manufacturing. What matters is that the solid dissolves completely and quickly when you add your reconstitution solvent. If it doesn't, something may have gone wrong during storage or shipping (more on troubleshooting later).
Some peptides, particularly those containing aromatic amino acids like tryptophan or tyrosine, may have a slightly yellowish tint. This is usually normal. However, a dark yellow, brown, or distinctly colored cake often indicates degradation from heat exposure, and such vials should not be used.
The Role of Excipients
Many pharmaceutical-grade lyophilized peptides include excipients - inactive ingredients added to improve stability, cake structure, or reconstitution behavior. The most common excipients you'll encounter include:
- Mannitol - a sugar alcohol that forms a crystalline matrix, providing mechanical strength to the cake and preventing collapse during drying. Mannitol also acts as a bulking agent, making very small peptide quantities easier to handle and see in the vial.
- Trehalose - a non-reducing disaccharide that forms a glassy (amorphous) matrix around peptide molecules during drying. According to the "water replacement hypothesis" first proposed by Carpenter and Crowe in the 1980s, trehalose hydrogen bonds substitute for the water molecules that normally stabilize peptide conformation, preserving the native structure in the dry state (Carpenter & Crowe, 1989).
- Sucrose - functions similarly to trehalose as a lyoprotectant (protector during freeze-drying) and cryoprotectant (protector during freezing). Sucrose is widely used but is a reducing sugar, which means it can participate in Maillard reactions with free amino groups over extended storage periods.
- Sodium phosphate or histidine buffers - maintain pH during reconstitution. The pH of the reconstituted solution affects both peptide stability and injection comfort.
These excipients are present in very small amounts and are generally recognized as safe (GRAS) or are listed in the FDA's Inactive Ingredient Database. They dissolve along with the peptide during reconstitution and do not affect dosing calculations.
Common Peptide Vial Sizes
Peptides are typically supplied in small glass vials with rubber stoppers and aluminum crimp seals. The most common configurations include:
| Vial Size | Typical Peptide Amount | Common Examples |
|---|---|---|
| 2 mL vial | 1-5 mg | BPC-157 (5 mg), Selank (5 mg), Semax (5 mg) |
| 3 mL vial | 5-15 mg | CJC-1295/Ipamorelin (blend), TB-500 (5-10 mg) |
| 5 mL vial | 5-30 mg | Semaglutide (5-10 mg), Tirzepatide (10-30 mg) |
| 10 mL vial | 10-100 mg | NAD+ (100 mg+), larger peptide preparations |
The vial size determines the maximum reconstitution volume. Never add more liquid than the vial can hold - leave at least 20% headspace for the rubber stopper and to allow room for swirling during dissolution. For a 2 mL vial, the practical maximum is about 1.5-2.0 mL of bacteriostatic water. For a 3 mL vial, you can comfortably add up to 2.5 mL.
Now that you understand what's in the vial and why it's in powder form, let's discuss the solvent you'll use to bring it back to life.
Bacteriostatic Water vs Sterile Water
Choosing the correct reconstitution solvent is not a trivial decision. The wrong choice can either introduce contamination risk or, in rare cases, cause adverse reactions. Here's what you need to know about each option and when to use it.
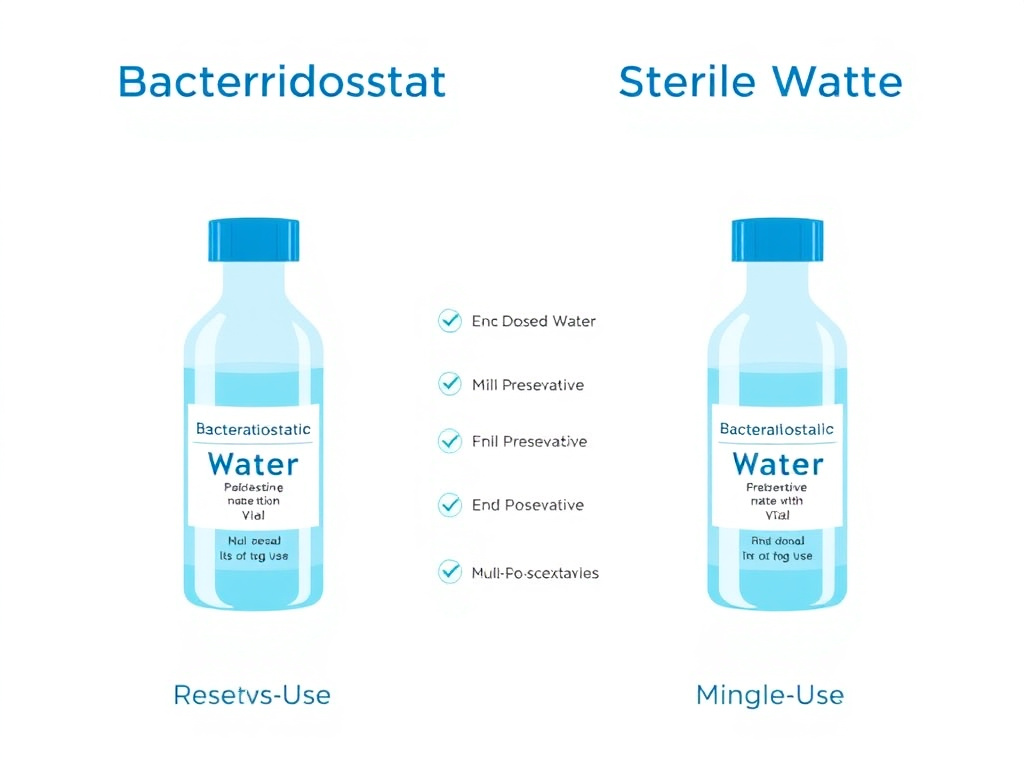
Bacteriostatic Water (BAC Water)
Bacteriostatic water for injection, USP, is sterile water that contains 0.9% (9 mg/mL) benzyl alcohol as an antimicrobial preservative. The benzyl alcohol disrupts microbial cell membranes, inhibiting bacterial growth and preventing contamination when the vial is accessed multiple times with a needle (Deans & Bhatt, 2023). This preservative action is what makes bacteriostatic water the standard choice for reconstituting multi-dose peptide vials.
According to USP Chapter 797 and the CDC's Safe Injection Practices guidelines, multi-dose vials may be used for up to 28 days after first puncture, provided they are stored at recommended temperatures and handled with proper aseptic technique (CDC, 2023). The 28-day window aligns with the effective duration of the benzyl alcohol preservative. After this period, the inhibitory capacity diminishes, and bacterial contamination risk rises to unacceptable levels.
Bacteriostatic water is available in several package sizes:
- 30 mL multi-dose vials - the most common and practical size for peptide reconstitution. A single vial provides enough water for multiple peptide reconstitutions.
- 10 mL vials - useful when you only need to reconstitute one or two vials and want to minimize waste.
- Pre-loaded syringes - some suppliers offer bacteriostatic water in ready-to-use syringes, which reduces contamination risk during transfer but limits volume flexibility.
Store bacteriostatic water at controlled room temperature (20-25 degrees Celsius) before opening. Once opened, mark the date on the vial and discard after 28 days. Refrigeration after opening is not required for the water itself, though many people store it in the refrigerator alongside their reconstituted peptides for convenience.
Sterile Water for Injection (SWFI)
Sterile water for injection, USP, is exactly what the name implies: water that has been sterilized (typically by autoclaving or membrane filtration) and packaged in a sealed container. It contains no preservative, no bacteriostatic agent, and no buffer. Once you break the seal and introduce a needle, there is nothing to prevent microbial growth if contamination occurs.
Sterile water for injection is intended for single-use only. The USP explicitly states that once a SWFI container is opened, the entire contents should be used immediately, and any unused portion must be discarded (USP, 2023). This makes SWFI impractical for most peptide reconstitution scenarios, where you'll be drawing multiple doses from the same vial over days or weeks.
There are, however, specific situations where sterile water is appropriate or even preferred:
- When the entire reconstituted volume will be administered in a single dose
- When the patient has a known allergy or sensitivity to benzyl alcohol
- For neonatal or pediatric preparations, as benzyl alcohol has been associated with toxicity in premature infants at high cumulative doses (the so-called "gasping syndrome") (Gershanik et al., 1982)
- When the peptide manufacturer specifically contraindicates benzyl alcohol in their reconstitution instructions
Other Reconstitution Solvents
While bacteriostatic water and sterile water account for the vast majority of peptide reconstitutions, you may occasionally encounter other solvents:
Bacteriostatic sodium chloride (0.9% NaCl with benzyl alcohol) - sometimes called "bacteriostatic normal saline." This is isotonic and contains a preservative, making it suitable for multi-dose use. Some peptide manufacturers recommend it when the peptide is sensitive to the hypotonicity of plain water. The added sodium chloride can also improve solubility for certain peptides.
Sterile normal saline (0.9% NaCl, no preservative) - isotonic and single-use only. Used when a preservative is contraindicated but the peptide requires an isotonic environment for stability.
Acetic acid solutions (0.1-1.0%) - required for some highly hydrophobic peptides that won't dissolve in water at neutral pH. If your peptide manufacturer specifies acetic acid for reconstitution, do not substitute bacteriostatic water. The low pH is necessary for solubilization.
DMSO (dimethyl sulfoxide) - used in research settings for peptides that are completely insoluble in aqueous media. DMSO is not appropriate for injectable preparations in clinical settings due to toxicity concerns at injection volumes.
Head-to-Head Comparison
| Feature | Bacteriostatic Water | Sterile Water |
|---|---|---|
| Preservative | 0.9% benzyl alcohol | None |
| Multi-dose use | Yes (up to 28 days) | No (single use only) |
| Bacterial inhibition | Yes | No |
| Neonatal safe | No (benzyl alcohol risk) | Yes |
| Storage after opening | Room temperature, 28 days | Discard after single use |
| Cost (typical) | $5-15 per 30 mL vial | $2-8 per vial |
| Availability | Prescription or OTC depending on state | Widely available OTC |
| Best use case | Multi-dose peptide vials | Single-dose preparations |
Common Mistake
Do not confuse bacteriostatic water with distilled water, purified water, or tap water. None of these are sterile, and using them for injection reconstitution creates a serious infection risk. Only use USP-grade bacteriostatic water for injection or sterile water for injection from a sealed, commercially manufactured vial. Water from any other source, regardless of how "clean" it appears, may contain bacteria, endotoxins, particulates, or dissolved contaminants that can cause injection site infections, abscesses, or systemic illness.
How Much Bacteriostatic Water to Add
The volume of bacteriostatic water you add determines the concentration of your reconstituted peptide solution, which in turn determines how many units you'll draw for each dose. This is where dosing math comes in, and we'll cover it in detail in the Dosing Calculations section below. But here are the general principles:
- More water = lower concentration = larger injection volumes per dose. This makes it easier to measure small doses accurately but means each injection is a larger volume of fluid under the skin.
- Less water = higher concentration = smaller injection volumes per dose. This is more convenient for injection but can make it harder to measure very small doses precisely, especially with larger syringes that have wider tick mark spacing.
The sweet spot for most peptides is a reconstitution volume that produces doses between 5 and 25 units (0.05-0.25 mL) on an insulin syringe. This range is large enough to measure accurately with the syringe markings but small enough to be comfortable for subcutaneous injection. The FormBlends Dosing Calculator can help you find the ideal reconstitution volume for your specific peptide and dose.
For GLP-1 agonists like semaglutide and tirzepatide, which are often supplied in larger vial sizes (5-30 mg), the reconstitution volumes tend to be proportionally larger. A common configuration for a 5 mg semaglutide vial is 2-3 mL of bacteriostatic water. For a 10 mg tirzepatide vial, 2 mL is typical. Always follow the reconstitution instructions provided by your compounding pharmacy or prescriber, as these volumes are chosen to match specific dosing protocols.
Reconstitution Step-by-Step
Follow this protocol exactly and you'll reconstitute your peptide safely, maintain sterility, and preserve full potency. Each step matters - skip one and you introduce unnecessary risk.
What You'll Need
Before you start, gather all supplies so you can work efficiently without interruptions. Every time you pause mid-process, you increase the window for contamination. Here's your checklist:
- Lyophilized peptide vial - check the label for peptide identity, amount (mg), lot number, and expiration date
- Bacteriostatic water for injection, USP - from a sealed, commercially manufactured vial
- Alcohol swabs (70% isopropyl alcohol) - individually wrapped, sterile
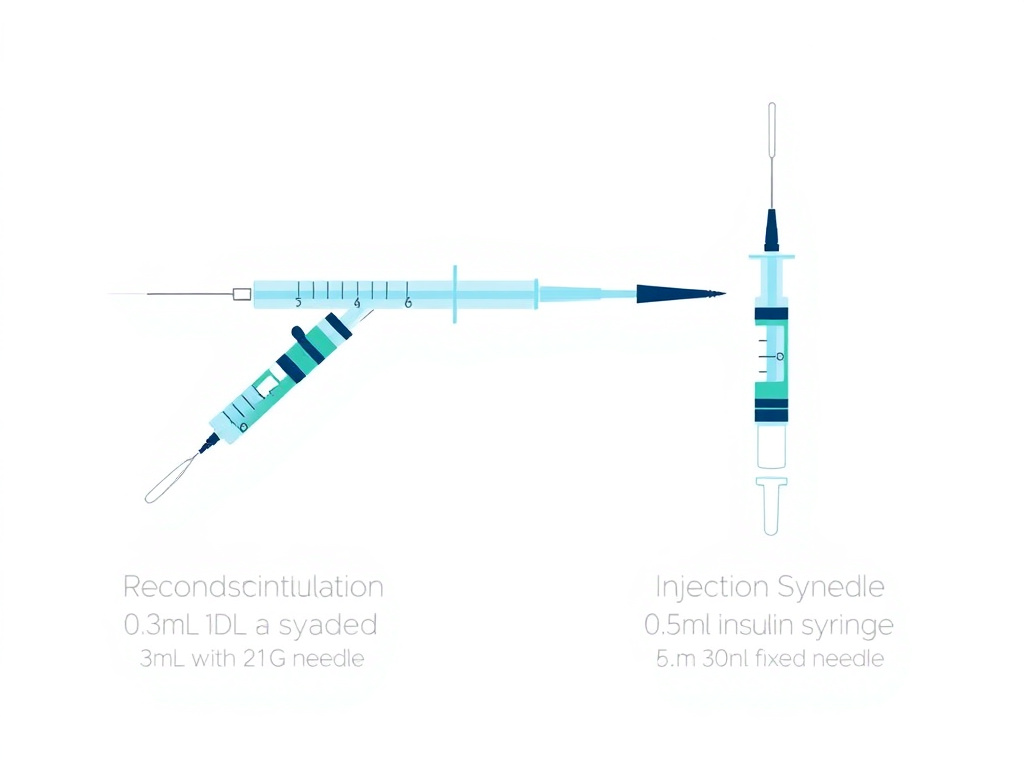
- Reconstitution syringe - a 1 mL or 3 mL syringe with an 18-22 gauge needle for drawing and transferring the water
- Insulin syringe - a fresh U-100 insulin syringe (29-31 gauge) for drawing your doses after reconstitution
- Clean, flat work surface - wiped down with isopropyl alcohol
- Sharps container - for safe needle disposal
- Label or marker - to mark the vial with date, concentration, and discard-by date
Pro Tip
Use a separate, larger-gauge needle for reconstitution (not your fine insulin needle). Pushing bacteriostatic water through a rubber stopper with a 29-31 gauge insulin needle is slow, difficult, and dulls the needle tip. An 18-22 gauge needle on a 1-3 mL syringe makes the transfer quick and easy, and you'll preserve the sharpness of your injection needles for a more comfortable injection experience.
Step 1: Equilibrate to Room Temperature
Remove the lyophilized peptide vial from the freezer or refrigerator and allow it to sit at room temperature for 15-20 minutes. Do not attempt to reconstitute a cold vial. Temperature differences between the cold powder and room-temperature water can cause condensation inside the vial, and rapid temperature changes can stress the peptide's molecular structure.
Similarly, if your bacteriostatic water has been refrigerated, let it warm to room temperature. Cold water dissolves lyophilized peptides more slowly and can cause incomplete dissolution or precipitation.
While the vial equilibrates, this is a good time to do your dosing math. Calculate how much bacteriostatic water you need to add based on the peptide amount in the vial and your desired concentration. We cover this calculation in full detail in the next section, but here's the quick formula:
Volume of water (mL) = Peptide amount (mg) / Desired concentration (mg/mL)
Step 2: Sanitize
Wash your hands thoroughly with soap and water. Some practitioners also wear nitrile gloves, which is good practice but not strictly required for self-administration.
Take an alcohol swab and wipe the rubber stopper of the peptide vial in a single direction with firm pressure. Don't dab or circle - use a deliberate, one-directional swipe. Let the alcohol evaporate completely (about 30 seconds) before inserting any needle. Injecting through wet alcohol can carry trace amounts of isopropyl into the vial, which is undesirable.
Repeat the same swabbing process on the rubber stopper of your bacteriostatic water vial.
Research from a 2024 study published in the American Journal of Infection Control confirmed that while the baseline contamination risk of sealed vial stoppers is low, alcohol swabbing with 70% isopropyl remains best practice as a precautionary measure, particularly for multi-dose vials that will be accessed repeatedly (CDC, 2023).
Step 3: Draw the Bacteriostatic Water
Attach the 18-22 gauge needle to your reconstitution syringe. Remove the needle cap. Pull back the plunger to draw air equal to the volume of bacteriostatic water you plan to withdraw. For example, if you're adding 2 mL of water to the peptide vial, draw 2 mL of air into the syringe.
Insert the needle through the center of the bacteriostatic water vial's rubber stopper. Push the air in - this creates positive pressure inside the vial, making it easier to draw liquid out. Invert the vial and draw the desired volume of bacteriostatic water. Check for air bubbles. Tap the syringe barrel to move any bubbles to the top, then gently push the plunger to expel them back into the vial. Withdraw the needle.
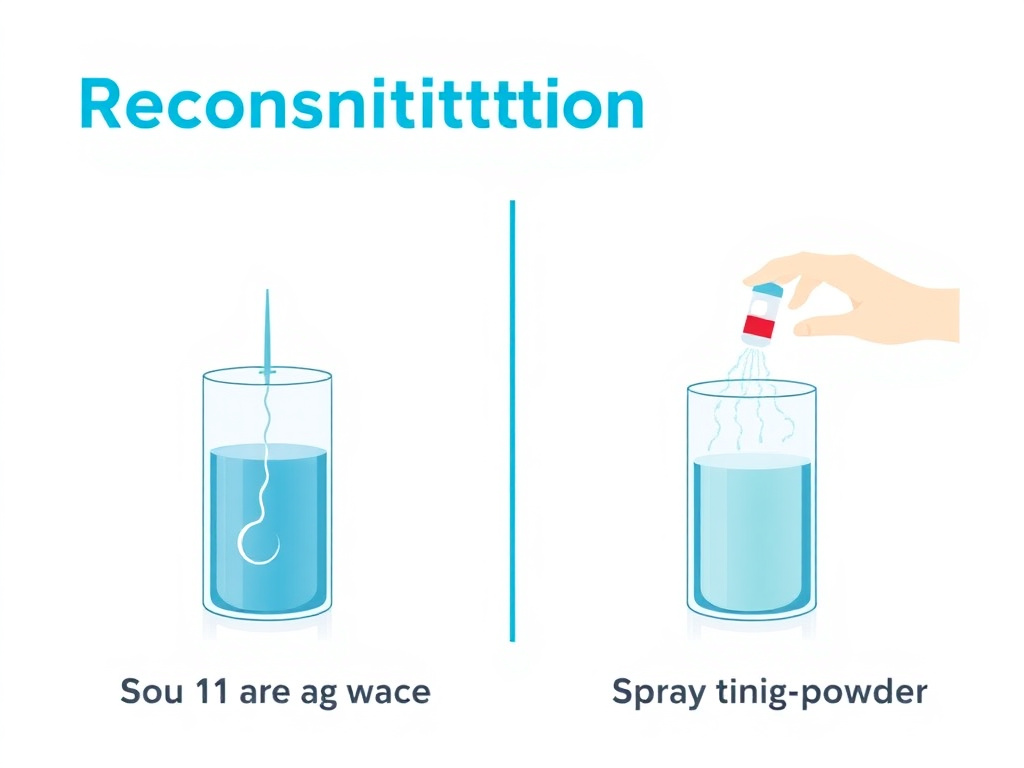
Step 4: Add Water to the Peptide Vial
This is the most critical step, and it's where most people make mistakes. Here's how to do it correctly:
- Insert the reconstitution needle through the center of the peptide vial's rubber stopper at a slight angle, so the needle tip touches the inside glass wall of the vial near the top.
- Depress the plunger slowly. Let the water trickle down the inside wall of the vial. It should run down the glass in a thin stream and pool at the bottom around and under the lyophilized cake. This takes 30-60 seconds for a typical 2 mL volume. Do not rush it.
- Never spray the water directly onto the peptide powder. Direct force from a water stream can physically damage the peptide structure, cause excessive foaming, and lead to denaturation. The powder should dissolve gradually from the bottom up as water surrounds it.
- Once all the water is in the vial, withdraw the needle.
Critical Warning
If you push the plunger too fast and the water jets directly onto the lyophilized cake, you may see immediate foaming or the solution may turn cloudy. This indicates possible peptide denaturation. While some peptides can tolerate moderate agitation, others - particularly larger peptides and those with complex tertiary structures - can be permanently damaged by this mechanical stress. There is no way to "fix" a denatured peptide. Prevention through slow, gentle reconstitution is the only approach.
Step 5: Dissolve the Peptide
After adding all the bacteriostatic water, you need to dissolve the lyophilized cake completely. Here's the right way to do it:
- Swirl gently. Hold the vial between your thumb and forefinger and rotate your wrist in a slow, circular motion. The water should move around the inside of the vial, gradually dissolving the powder from the outside in.
- Roll between your palms. Place the vial horizontally between both palms and roll it back and forth. This provides gentle mixing without the air incorporation that shaking causes.
- Tilt slowly. Tip the vial at a 45-degree angle from side to side, letting the solution wash over any remaining undissolved powder.
Most peptides dissolve within 1-3 minutes with gentle swirling. Some may take up to 5 minutes. If you still see undissolved particles after 5 minutes of gentle agitation, let the vial sit undisturbed for 10-15 minutes, then try again. Peptides with hydrophobic regions sometimes need a bit more time to fully dissolve.
Never shake the vial. Vigorous shaking creates foam and introduces air bubbles, which expose the peptide to air-liquid interfaces where denaturation and aggregation are accelerated. Peptides are surface-active molecules that unfold at air-water boundaries, losing their biological structure (Mahler et al., 2005). The result can be reduced potency or a completely inactive product.
Never use a vortex mixer. Vortex mixing generates extreme shear forces that are far more destructive than hand shaking. Laboratory research peptides handled with vortex mixers regularly show decreased bioactivity compared to gently swirled preparations (Manning et al., 2010).
Step 6: Inspect the Solution
Hold the vial up to a light source and examine it carefully. A properly reconstituted peptide solution should be:
- Clear - you should be able to see through it without any haze or cloudiness
- Colorless to very pale yellow - a slight yellow tint is acceptable for some peptides, but significant color indicates degradation
- Free of visible particles - no floating bits, fibers, or precipitate should be present
- Minimal foam - a few small bubbles on the surface are normal and will dissipate; a persistent layer of foam suggests excessive agitation
If the solution is cloudy, contains visible particles that won't dissolve, or has significant color, do not use it. These are signs of peptide aggregation, denaturation, or contamination. Contact your supplier for a replacement.
Step 7: Label the Vial
Immediately label the vial with:
- Peptide name and amount (e.g., "BPC-157, 5 mg")
- Reconstitution date
- Concentration after reconstitution (e.g., "2.5 mg/mL" or "2,500 mcg/mL")
- Discard-by date (28 days from reconstitution date)
This label is your safety net against confusion, especially if you're working with multiple peptides. Unlabeled vials are a recipe for dosing errors.
Step 8: Store Properly
Place the reconstituted vial upright in your refrigerator at 2-8 degrees Celsius (36-46 degrees Fahrenheit). The main compartment of a standard household refrigerator is typically 3-5 degrees C, which is perfect. Do not store in the door (temperature fluctuates too much with opening and closing), and do not place near the back wall where items can freeze.
Detailed storage guidance is in the Storage and Stability section below.
Quick Reference Protocol Card
| Step | Action | Time | Key Caution |
|---|---|---|---|
| 1 | Equilibrate vial to room temp | 15-20 min | Don't reconstitute cold |
| 2 | Alcohol-swab both stoppers | 30 sec each | Let alcohol dry fully |
| 3 | Draw BAC water with large-gauge needle | 1 min | Inject air first for easy draw |
| 4 | Add water slowly down vial wall | 30-60 sec | Never spray onto powder |
| 5 | Swirl/roll gently to dissolve | 1-5 min | Never shake or vortex |
| 6 | Inspect for clarity and particles | 30 sec | Discard if cloudy |
| 7 | Label with date and concentration | 30 sec | Include discard-by date |
| 8 | Refrigerate at 2-8 degrees C | Immediately | Avoid door shelf and freezer |
Dosing Calculations & Math
Dosing math is where most peptide users feel overwhelmed. The good news: it's simple arithmetic once you understand three relationships - concentration, dose volume, and syringe units. Let's break it down systematically.
The Three Core Concepts
1. Concentration tells you how much peptide is dissolved in each milliliter of solution. After reconstitution, your concentration is:
Concentration (mg/mL) = Peptide Amount (mg) / Water Volume (mL)
For example, if you add 2 mL of bacteriostatic water to a 5 mg vial of BPC-157:
5 mg / 2 mL = 2.5 mg/mL
Since peptide doses are usually measured in micrograms (mcg), let's convert: 2.5 mg/mL = 2,500 mcg/mL (multiply by 1,000).
2. Dose Volume tells you how many milliliters of solution contain your desired dose:
Dose Volume (mL) = Desired Dose (mcg) / Concentration (mcg/mL)
Continuing our example, if you want a 250 mcg dose of BPC-157:
250 mcg / 2,500 mcg/mL = 0.10 mL
3. Syringe Units translate milliliters into the markings on a U-100 insulin syringe:
Units on syringe = Dose Volume (mL) x 100
So 0.10 mL = 10 units on a U-100 insulin syringe.
That's the entire framework. Three formulas, applied in sequence: concentration, dose volume, syringe units. If you can do division and multiplication, you can calculate any peptide dose.
The Complete Worked Example
Let's walk through a real-world scenario from start to finish to cement the process.
Scenario: You have a 10 mg vial of CJC-1295/Ipamorelin blend. Your protocol calls for 300 mcg of CJC-1295 per injection (the vial contains a 1:1 blend, so 5 mg CJC-1295 and 5 mg Ipamorelin). You'll add 2 mL of bacteriostatic water.
Step 1 - Calculate concentration:
Total peptide: 10 mg in 2 mL = 5 mg/mL = 5,000 mcg/mL total blend
Since it's a 1:1 blend: CJC-1295 concentration = 2,500 mcg/mL; Ipamorelin concentration = 2,500 mcg/mL
Step 2 - Calculate dose volume for 300 mcg CJC-1295:
300 mcg / 2,500 mcg/mL = 0.12 mL
Step 3 - Convert to syringe units:
0.12 mL x 100 = 12 units
Verification: At 12 units (0.12 mL), you're getting 300 mcg CJC-1295 AND 300 mcg Ipamorelin (since it's a 1:1 blend). That's consistent with typical protocols for this combination.
How many doses per vial?
Total volume: 2 mL = 200 units
Per dose: 12 units
200 / 12 = approximately 16 doses per vial
Unit Conversions Reference
The most common source of dosing errors is confusing units of measurement. Here's your conversion cheat sheet:
| Conversion | Relationship | Example |
|---|---|---|
| mg to mcg | 1 mg = 1,000 mcg | 0.25 mg = 250 mcg |
| mcg to mg | 1 mcg = 0.001 mg | 500 mcg = 0.5 mg |
| mL to units (U-100) | 1 mL = 100 units | 0.15 mL = 15 units |
| Units to mL (U-100) | 1 unit = 0.01 mL | 25 units = 0.25 mL |
| mg to IU (HGH only) | 1 mg HGH ~ 3 IU | 2 mg HGH ~ 6 IU |
| g to mg | 1 g = 1,000 mg | 0.005 g = 5 mg |
IU Caution
International Units (IU) measure biological activity, not weight. The IU-to-mg conversion is different for every compound. The 1 mg = 3 IU relationship applies only to human growth hormone (somatropin). It does not apply to BPC-157, semaglutide, insulin, or any other peptide. If your protocol specifies IU, you need the compound-specific conversion factor. When in doubt, confirm with your prescriber or pharmacist. The FormBlends Dosing Calculator handles IU conversions for supported compounds automatically.
Reconstitution Volume Reference Table
This table shows the resulting concentration and dose volumes for common peptide amounts at different reconstitution volumes. Use it as a quick reference when deciding how much bacteriostatic water to add.
| Peptide Amount | BAC Water Added | Concentration | Volume for 100 mcg | Volume for 250 mcg | Volume for 500 mcg |
|---|---|---|---|---|---|
| 2 mg | 1 mL | 2,000 mcg/mL | 5 units | 12.5 units | 25 units |
| 5 mg | 1 mL | 5,000 mcg/mL | 2 units | 5 units | 10 units |
| 5 mg | 2 mL | 2,500 mcg/mL | 4 units | 10 units | 20 units |
| 5 mg | 2.5 mL | 2,000 mcg/mL | 5 units | 12.5 units | 25 units |
| 10 mg | 1 mL | 10,000 mcg/mL | 1 unit | 2.5 units | 5 units |
| 10 mg | 2 mL | 5,000 mcg/mL | 2 units | 5 units | 10 units |
| 10 mg | 3 mL | 3,333 mcg/mL | 3 units | 7.5 units | 15 units |
| 15 mg | 3 mL | 5,000 mcg/mL | 2 units | 5 units | 10 units |
| 30 mg | 3 mL | 10,000 mcg/mL | 1 unit | 2.5 units | 5 units |
Notice a pattern: if your dose volume comes out to fewer than 3 units, you're working with a concentration that's too high for precise measurement with a standard insulin syringe. The smallest reliable increment on most U-100 syringes is 1 unit (0.01 mL), and many clinicians consider measurements below 3-5 units to be imprecise. In these cases, add more bacteriostatic water to reduce the concentration and increase the dose volume.
Conversely, if your dose volume exceeds 30-40 units (0.3-0.4 mL), you may want to use less water to increase the concentration. Larger injection volumes are less comfortable subcutaneously and can form noticeable welts or bumps at the injection site.
GLP-1 Dosing: Semaglutide and Tirzepatide Math
GLP-1 receptor agonists like semaglutide and tirzepatide have dose-escalation (titration) protocols that change the dose week by week. This means the number of units you draw changes over time, even though the concentration stays the same. Let's work through both.
Semaglutide Example
Vial: 5 mg semaglutide, reconstituted with 2 mL bacteriostatic water
Concentration: 5 mg / 2 mL = 2.5 mg/mL = 2,500 mcg/mL
| Week | Dose | Dose in mcg | Volume (mL) | Syringe Units |
|---|---|---|---|---|
| Weeks 1-4 | 0.25 mg | 250 mcg | 0.10 mL | 10 units |
| Weeks 5-8 | 0.50 mg | 500 mcg | 0.20 mL | 20 units |
| Weeks 9-12 | 1.0 mg | 1,000 mcg | 0.40 mL | 40 units |
| Weeks 13-16 | 1.7 mg | 1,700 mcg | 0.68 mL | 68 units |
| Week 17+ | 2.4 mg | 2,400 mcg | 0.96 mL | 96 units |
Notice that at higher doses (1.7 mg and above), a single 5 mg vial doesn't last long. At the 2.4 mg maintenance dose, one vial provides roughly 2 weekly doses. Many clinicians prescribe 10 mg or larger vials for patients at maintenance doses to reduce reconstitution frequency.
Tirzepatide Example
Vial: 30 mg tirzepatide, reconstituted with 3 mL bacteriostatic water
Concentration: 30 mg / 3 mL = 10 mg/mL = 10,000 mcg/mL
| Week | Dose | Dose in mcg | Volume (mL) | Syringe Units |
|---|---|---|---|---|
| Weeks 1-4 | 2.5 mg | 2,500 mcg | 0.25 mL | 25 units |
| Weeks 5-8 | 5.0 mg | 5,000 mcg | 0.50 mL | 50 units |
| Weeks 9-12 | 7.5 mg | 7,500 mcg | 0.75 mL | 75 units |
| Weeks 13-16 | 10.0 mg | 10,000 mcg | 1.00 mL | 100 units |
| Week 17+ | 15.0 mg | 15,000 mcg | 1.50 mL | Use 3 mL syringe |
At the 15 mg dose level, you need 1.5 mL per injection, which exceeds the capacity of a standard 1 mL insulin syringe. In this case, you would either use a 3 mL syringe with a detachable needle, reconstitute with less water to increase the concentration, or split the dose into two injections.
Working With Half-Unit (0.5 Unit) Syringes
For very small doses, some practitioners use half-unit increment insulin syringes (available in 0.3 mL and 0.5 mL sizes). These syringes have markings at every 0.5 units instead of every 1 unit, doubling your measurement precision. They're particularly useful for peptides like Selank and Semax where therapeutic doses are small and precision matters.
With a half-unit syringe, you can reliably measure doses as small as 0.5 units (0.005 mL). At a concentration of 5,000 mcg/mL, that's 25 mcg - sufficient granularity for virtually any peptide dosing protocol.
Common Dosing Scenarios Quick Reference
Here are pre-calculated dose volumes for the most popular peptides at typical reconstitution volumes. These assume standard dosing protocols - always verify with your prescriber or the FormBlends Dosing Calculator.
| Peptide | Vial Size | BAC Water | Typical Dose | Syringe Units |
|---|---|---|---|---|
| BPC-157 | 5 mg | 2 mL | 250-500 mcg | 10-20 units |
| TB-500 | 5 mg | 2 mL | 750-2,500 mcg | 30-100 units |
| CJC/Ipamorelin | 10 mg blend | 2 mL | 300 mcg each | 12 units |
| Sermorelin | 5 mg | 2.5 mL | 200-300 mcg | 10-15 units |
| Semaglutide | 5 mg | 2 mL | 250-2,400 mcg | 10-96 units |
| Tirzepatide | 30 mg | 3 mL | 2,500-15,000 mcg | 25-150 units |
| Epithalon | 10 mg | 2 mL | 5,000-10,000 mcg | 100 units or 1 mL syringe |
| MK-677 | Oral, no reconstitution needed | N/A | 10-25 mg oral | N/A |
Clinical Note
Note that MK-677 (ibutamoren) is administered orally, not by injection, so reconstitution math does not apply. It is typically supplied as a capsule or liquid suspension. Similarly, some peptides like Selank are available in intranasal formulations that come pre-mixed and ready to use.
The "Tick Mark" Method for People Who Hate Math
If formulas make your eyes glaze over, here's a purely visual approach that works for the most common scenario (5 mg peptide vial):
- Add exactly 1 mL of bacteriostatic water to a 5 mg vial. This creates a round concentration of 5,000 mcg/mL.
- On a U-100 insulin syringe, each tick mark (1 unit = 0.01 mL) now equals exactly 50 mcg.
- Count tick marks to get your dose:
- 2 tick marks = 100 mcg
- 5 tick marks = 250 mcg
- 10 tick marks = 500 mcg
This method sacrifices some flexibility (you're locked into the 5,000 mcg/mL concentration) but eliminates all division. If your standard dose is 250 mcg, you just pull to the "5" line every time. Simple.
For a 10 mg vial with 1 mL water, each tick mark equals 100 mcg. For a 10 mg vial with 2 mL water, each tick mark equals 50 mcg. Choose the reconstitution volume that makes your dose land on a whole-number tick mark.
Common Reconstitution Volumes
The chart below illustrates how the reconstitution volume affects the injection volume needed for a standard 250 mcg dose. Choosing the right water volume is about finding the balance between measurement precision (more water = more units to draw = easier to be precise) and injection comfort (less water = smaller injection volume = less discomfort).
mL per 250 mcg Dose by Reconstitution Volume
Adding more BAC water reduces the concentration, increasing the volume per dose. The trade-off is larger injections but better measurement precision for small doses.
As you can see from the chart, doubling the reconstitution volume from 1 mL to 2 mL for a 5 mg vial doubles the injection volume (from 5 to 10 units for a 250 mcg dose). For most people, the 2 mL reconstitution volume offers the best balance - 10 units is easy to measure accurately and comfortable to inject subcutaneously. If you're new to peptide injections, err on the side of more water for better precision, then adjust for future vials once you're confident in your measurement technique.
Injection Technique
Proper injection technique ensures consistent peptide absorption, minimizes discomfort, and prevents complications like infection, bruising, and tissue damage. Most peptides are administered subcutaneously, though some protocols call for intramuscular injection. We'll cover both methods in detail.
Subcutaneous (SubQ) Injection
Subcutaneous injection deposits the peptide into the layer of fat and connective tissue between the skin and the underlying muscle. This is the standard administration route for the vast majority of peptide therapies, including BPC-157, semaglutide, tirzepatide, CJC-1295/Ipamorelin, sermorelin, and TB-500.
Subcutaneous tissue has a moderate blood supply, which produces a slower, more sustained absorption profile compared to intramuscular injection. For peptides that mimic natural pulsatile hormone release - like growth hormone secretagogues - this gradual absorption actually matches the physiological pattern better than the rapid bolus you'd get from an IM injection (Richter et al., 2012).
Step-by-Step SubQ Injection Protocol
- Prepare your dose. Wipe the reconstituted peptide vial stopper with an alcohol swab. Using a fresh insulin syringe (29-31 gauge, 0.5-inch needle), insert the needle through the stopper and inject air equal to your dose volume. Invert the vial and draw the correct number of units. Tap out any air bubbles and adjust the plunger to the exact dose.
- Select your injection site. The preferred subcutaneous sites are:
- Lower abdomen - the most popular site. Inject at least 2 inches (5 cm) from the navel, in the semicircular area between the hip bones. Avoid the midline. The abdomen generally provides the most consistent absorption rates for peptides (Beshyah et al., 1991).
- Outer thigh - the lateral aspect of the thigh, about midway between the hip and knee. Pinch a fold of tissue to ensure you're in the subcutaneous layer rather than muscle.
- Back of the upper arm - the triceps area. This site is harder to reach for self-injection and is more commonly used when a partner or caregiver administers the injection.
- Upper-outer buttock - the area above and lateral to the gluteal fold. This site has thicker subcutaneous tissue in most people, making it suitable for slightly larger injection volumes.
- Clean the injection site. Use a fresh alcohol swab and wipe the skin in a circular motion from the center outward. Allow the alcohol to dry completely (30 seconds). Injecting through wet alcohol stings and can introduce alcohol into the tissue, causing irritation.
- Pinch the skin. Use your non-dominant hand to pinch a 1-2 inch fold of skin and subcutaneous tissue between your thumb and forefinger. Lift the fold away from the underlying muscle. This creates a clear target and ensures the needle reaches the subcutaneous layer rather than muscle.
- Insert the needle. Hold the syringe like a pencil or dart in your dominant hand. Insert the needle at a 45 to 90 degree angle in a single, smooth, quick motion.
- For people with minimal subcutaneous tissue (lean individuals), use a 45-degree angle to ensure the needle stays in the fat layer.
- For people with more subcutaneous tissue, a 90-degree angle (straight in) is appropriate with a 0.5-inch (12.7 mm) needle.
- Insert the full length of the needle. Half-inserted needles can cause medication to leak back out.
- Inject the peptide. Push the plunger down slowly and steadily. A slow injection (5-10 seconds for a typical dose) reduces discomfort and allows the tissue to accommodate the fluid. Rushing the injection can cause pain, bruising, and more pronounced welts.
- Wait, then withdraw. After the plunger is fully depressed, count to 5-10 before removing the needle. This pause allows the full dose to disperse into the tissue and reduces the chance of medication leaking back through the needle track (known as "tracking" or "leakback").
- Release and dispose. Release the skin fold. Withdraw the needle in the same angle it entered. Do not rub the injection site - rubbing can increase bruising and may affect absorption. If there's a small drop of blood, gently press with a clean cotton ball or gauze. Dispose of the used syringe in a sharps container immediately. Never recap a used needle.
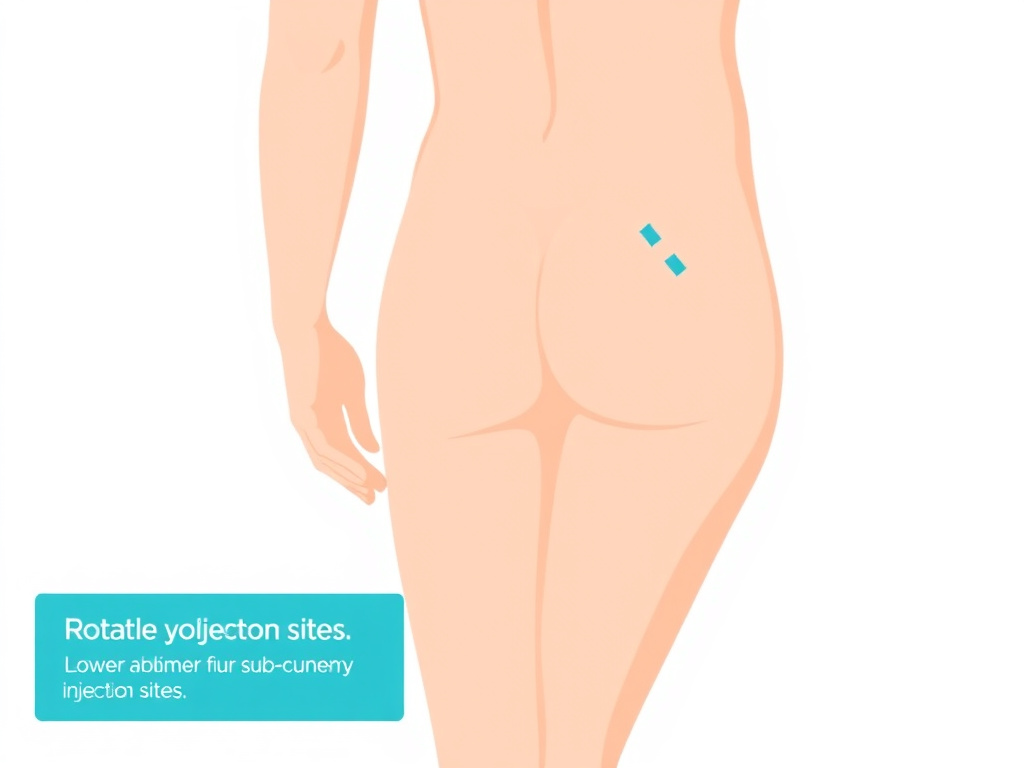
Injection Site Rotation
Rotating injection sites is not optional - it's a critical practice for anyone using injectable peptides regularly. Repeatedly injecting in the same spot can cause:
- Lipohypertrophy - localized accumulation of fat cells that creates firm, rubbery lumps under the skin. These lumps alter drug absorption, making doses unpredictable. Insulin-dependent diabetics are very familiar with this complication, and the same principles apply to peptide users (Famulla et al., 2016).
- Lipoatrophy - localized loss of subcutaneous fat, creating visible depressions in the skin. This is less common with modern peptide formulations but can occur with repeated trauma to the same site.
- Scar tissue formation - repeated needle punctures create micro-scars that become progressively harder and more painful to inject through.
A simple rotation system: divide each injection area into quadrants. Move clockwise through the quadrants, and alternate between different body areas. For example, if you inject daily, you might use the right abdomen on Monday, left abdomen on Tuesday, right thigh on Wednesday, left thigh on Thursday, and so on. Keep each individual injection at least 1 inch (2.5 cm) from the previous site in the same area.
Reducing Injection Discomfort
Most people find subcutaneous peptide injections to be minimally painful, especially with fine-gauge insulin needles. However, here are strategies to further reduce discomfort:
- Let the peptide warm to room temperature before injecting. Cold peptide solution straight from the refrigerator causes more injection site pain and can trigger local reactions. Remove the vial 15-30 minutes before your injection, or warm it briefly by rolling between your palms (Rini et al., 2016).
- Use a fresh needle every time. Insulin needle tips are coated with silicone lubricant that facilitates smooth insertion. After a single use, this coating is compromised and the needle tip is microscopically deformed, making subsequent insertions more painful.
- Apply ice for 30-60 seconds before injecting if you're particularly sensitive. Numbing the area with an ice cube wrapped in a thin cloth can significantly reduce the sensation of the needle puncture.
- Relax the muscle underneath the injection site. Tense muscles make the overlying tissue taut and harder to penetrate. Sit comfortably and consciously relax before injecting.
- Insert quickly, inject slowly. A fast, decisive needle insertion is less painful than a slow, tentative one. But once the needle is in, push the plunger slowly.
- Pinch with adequate pressure. A firm pinch on the skin fold activates pressure receptors that can partially mask the pain of needle insertion (gate control theory of pain).
Intramuscular (IM) Injection
Intramuscular injection delivers the peptide directly into muscle tissue, where the dense capillary network enables rapid absorption. IM injection produces higher peak concentrations and faster onset compared to subcutaneous administration, but the effect duration may be shorter (Richter et al., 2012).
IM injection is less common for peptides than SubQ, but some protocols specify it for certain compounds or situations:
- BPC-157 - some practitioners recommend IM injection near injured muscles for more localized delivery
- NAD+ - sometimes administered IM in clinical settings for rapid systemic availability
- Testosterone and other steroid hormones - while not peptides, they are often administered IM and may be part of a broader protocol alongside peptide therapy
IM Injection Protocol
Intramuscular injection requires a longer needle (typically 1 to 1.5 inches) and a larger gauge (22-25 gauge) than subcutaneous injection. The most common IM injection sites are:
- Deltoid (shoulder) - the triangular muscle at the top of the arm. Suitable for small volumes (up to 1 mL). Locate the injection site by finding the acromion process (the bony point of the shoulder) and injecting 2-3 finger-widths below it in the thickest part of the muscle.
- Vastus lateralis (outer thigh) - the large muscle on the outer side of the thigh. Suitable for volumes up to 2-3 mL. Divide the thigh into thirds; the injection site is in the outer middle third.
- Ventrogluteal (hip) - the gluteus medius muscle. Often considered the safest IM site due to the absence of major nerves and blood vessels in the area. Suitable for volumes up to 3-5 mL.
The injection technique differs from SubQ: do not pinch the skin. Instead, spread the skin taut with your non-dominant hand. Insert the needle at a 90-degree angle in a quick, dart-like motion. Aspirate briefly (pull back the plunger for 5-10 seconds) - if blood appears, you may have hit a blood vessel. Withdraw, discard the needle, and try again at a different site. If no blood appears, inject slowly and steadily, then withdraw and apply light pressure with gauze.
SubQ vs IM - Which Is Better for Peptides?
For the vast majority of peptide protocols, subcutaneous injection is preferred. It's easier to self-administer, uses smaller and less painful needles, carries a lower risk of hitting nerves or blood vessels, and provides a more gradual absorption profile that better matches the pharmacokinetics of most therapeutic peptides. Intramuscular injection should only be used when specifically directed by your prescribing clinician. Research published in the Journal of Controlled Release confirmed that subcutaneous injection sites significantly impact the pharmacokinetics of peptides, with the abdomen generally providing the most consistent absorption profiles (Richter et al., 2012).
Aspiration: Is It Necessary?
Aspiration - the practice of pulling back the plunger after needle insertion to check for blood return - has been a topic of evolving guidance. Here's the current consensus:
- Subcutaneous injections: Aspiration is NOT recommended. The WHO, CDC, and most nursing practice guidelines no longer recommend aspiration for SubQ injections. The subcutaneous tissue does not contain blood vessels large enough to accidentally inject into, and aspiration increases tissue trauma, pain, and the time the needle spends in the tissue (WHO, 2010).
- Intramuscular injections: Aspiration remains a matter of debate. Some guidelines still recommend it as a precaution, while others have dropped the recommendation based on evidence that the risk of intravascular injection at standard IM sites is extremely low. The ventrogluteal site, in particular, is considered safe without aspiration (Thomas et al., 2016).
Bottom line: if you're doing subcutaneous peptide injections (which is most people), skip aspiration entirely. It adds discomfort without meaningful safety benefit.
What About Intranasal Peptides?
Some peptides are formulated for intranasal administration, bypassing the need for injection entirely. Selank and Semax are the most common examples. These come as pre-mixed nasal spray solutions and don't require reconstitution by the end user. The nasal mucosa provides rapid absorption into the bloodstream and, for certain neuropeptides, potential direct access to the central nervous system via the olfactory pathway.
If you're using an intranasal peptide, follow the manufacturer's instructions for dosing (typically measured in sprays rather than units), storage, and administration technique. The reconstitution and injection guidance in this article does not apply to pre-mixed nasal formulations.
Syringe & Needle Selection
Using the right syringe and needle combination affects everything from measurement accuracy to injection comfort. Here's a detailed breakdown of your options and when to use each one.
Insulin Syringes for Dose Injection
U-100 insulin syringes are the standard tool for drawing and injecting peptide doses. They come in three common sizes:
| Syringe Size | Total Volume | Smallest Increment | Needle Gauge | Needle Length | Best For |
|---|---|---|---|---|---|
| 0.3 mL (30 unit) | 30 units / 0.3 mL | 0.5 or 1 unit | 29-31G | 5/16" (8mm) or 1/2" (12.7mm) | Very small doses (under 30 units). Best precision. |
| 0.5 mL (50 unit) | 50 units / 0.5 mL | 1 unit | 29-31G | 1/2" (12.7mm) | Most peptide doses. Good balance of capacity and precision. |
| 1.0 mL (100 unit) | 100 units / 1.0 mL | 1 or 2 units | 28-29G | 1/2" (12.7mm) | Larger doses (50+ units). Wider tick marks, slightly less precise. |
Precision Matters
The 0.3 mL syringe with half-unit markings provides the highest measurement accuracy. If your typical dose is 10 units or less, this syringe is strongly recommended. The tick marks on a 1.0 mL syringe are spaced far apart and represent 2 units each on some models, which means a measurement error of one tick mark equals a 20% dose error on a 10-unit dose. With a 0.3 mL syringe, each tick represents 0.5-1 unit, cutting the relative error significantly.
Needle Gauge Explained
The gauge number indicates needle diameter - higher gauge means thinner needle. Here's how the common gauges compare:
| Gauge | Outer Diameter | Pain Level | Use Case |
|---|---|---|---|
| 18G | 1.27 mm | Moderate-High | Drawing BAC water from vial (reconstitution only, never for injection) |
| 21G | 0.81 mm | Moderate | Drawing BAC water, IM injection for viscous solutions |
| 23G | 0.64 mm | Mild-Moderate | IM injection |
| 25G | 0.51 mm | Mild | IM or deep SubQ injection |
| 27G | 0.41 mm | Minimal | SubQ injection |
| 29G | 0.34 mm | Very Low | SubQ injection (standard insulin syringe) |
| 30G | 0.31 mm | Very Low | SubQ injection (fine insulin syringe) |
| 31G | 0.26 mm | Minimal | SubQ injection (ultra-fine insulin syringe) |
For subcutaneous peptide injections, 29-31 gauge is ideal. These ultra-fine needles are barely felt during insertion and leave minimal tissue trauma. The trade-off is that drawing peptide solution through these thin needles is slower - you'll need to pull the plunger steadily and patiently.
Needle Length Considerations
Needle length determines how deep the injection reaches:
- 5/16 inch (8 mm) - suitable for subcutaneous injection in lean individuals. May not fully penetrate the skin in areas with thicker subcutaneous tissue.
- 1/2 inch (12.7 mm) - the standard for subcutaneous injection. Works well for most body types and injection sites. This is the most common length on insulin syringes and the recommended choice for peptide administration.
- 1 inch (25.4 mm) - used for intramuscular injection in the deltoid or in lean patients at other IM sites.
- 1.5 inch (38.1 mm) - used for intramuscular injection in the ventrogluteal or vastus lateralis sites, particularly in larger patients with more subcutaneous tissue overlying the muscle.
Syringes for Reconstitution
Don't use your injection syringes for reconstitution. Reconstitution involves pushing water through rubber stoppers (which dulls the needle) and requires larger volumes than most insulin syringes hold comfortably. Keep separate syringes for each purpose:
| Purpose | Syringe Size | Needle Gauge | Needle Length |
|---|---|---|---|
| Drawing BAC water | 3 mL or 5 mL | 18-21G | 1-1.5 inch |
| Transferring water to peptide vial | Same syringe as above | Same needle | Same needle |
| Drawing peptide dose | 0.3-1.0 mL insulin syringe | 29-31G | 1/2 inch |
| Injecting peptide dose | Same syringe as above | Same needle (fixed) | Same needle |
Dead Space and Dose Accuracy
All syringes have "dead space" - a small volume of liquid that remains in the hub (the area where the needle attaches to the barrel) after the plunger is fully depressed. Standard insulin syringes with fixed (permanently attached) needles are designed to minimize dead space, typically to less than 0.5 units. However, syringes with detachable (Luer-lock or Luer-slip) needles can have dead space of 0.05-0.1 mL (5-10 units), which represents a significant dose loss.
For peptide dosing, always use fixed-needle insulin syringes. The minimal dead space ensures you deliver virtually the entire measured dose. If you must use a detachable-needle syringe (for example, for larger IM injections), account for the dead space by drawing an extra 2-5 units of air into the syringe after drawing your dose. This "air lock" pushes the remaining liquid out of the dead space during injection (Grassby & Hutchings, 2013).
Where to Get Supplies
Insulin syringes and bacteriostatic water are available from multiple sources:
- Pharmacies - most pharmacies carry insulin syringes. Some states require a prescription, while others allow over-the-counter purchase. Bacteriostatic water may require a prescription in some states.
- Online medical supply retailers - companies like ADW Diabetes, Total Diabetes Supply, and others ship insulin syringes nationwide. Prices are generally lower than pharmacy retail.
- Compounding pharmacies - if your peptide comes from a compounding pharmacy, they often supply the necessary reconstitution supplies (BAC water, syringes, alcohol swabs) along with the peptide.
- Your prescribing clinician's office - many telemedicine and in-person peptide prescribers include supply kits with their prescriptions.
For a complete rundown on getting started with peptide therapy, including finding a provider, visit the FormBlends Free Assessment page.
Storage & Stability
How you store your peptides - both before and after reconstitution - directly determines how long they remain potent and safe to use. Temperature, light, and contamination are the three enemies. Here's how to defeat all three.
Before Reconstitution: Lyophilized Storage
Unreconstituted, lyophilized peptides are relatively stable compared to their reconstituted counterparts. However, they still require proper storage to maintain potency over time. The general guidelines are:
| Storage Condition | Temperature | Expected Stability | Best For |
|---|---|---|---|
| Room temperature | 20-25 degrees C (68-77 degrees F) | Days to weeks | Short-term during shipping |
| Refrigerated | 2-8 degrees C (36-46 degrees F) | Months to 1 year | Medium-term storage |
| Frozen | -20 degrees C (-4 degrees F) | 1-3 years | Long-term storage |
| Deep frozen | -80 degrees C (-112 degrees F) | 3+ years | Research archives |
Most peptide vendors ship lyophilized products with cold packs to maintain refrigerated temperatures during transit. Brief exposure to room temperature during shipping (a few days) is generally not harmful to properly lyophilized peptides. However, prolonged exposure to heat, direct sunlight, or temperatures above 30 degrees C can initiate degradation even in the dry state.
Upon receiving your peptide, place any vials you won't reconstitute immediately in the freezer at -20 degrees C. This halts virtually all degradation pathways and extends shelf life to a year or more. When you're ready to use a vial, transfer it to the refrigerator the night before, then let it equilibrate to room temperature for 15-20 minutes before reconstitution.
Storage Rule of Thumb
Lyophilized = freezer for long-term, refrigerator for medium-term, room temp only during reconstitution. Reconstituted = refrigerator always, use within 28-30 days, never freeze unless absolutely necessary.
After Reconstitution: Refrigerated Storage
Once you've reconstituted your peptide with bacteriostatic water, the clock starts ticking. The reconstituted solution must be stored at 2-8 degrees Celsius (standard refrigerator temperature) and should be used within 28-30 days. This timeframe is based on two independent limits:
- Benzyl alcohol preservative efficacy. The 0.9% benzyl alcohol in bacteriostatic water maintains its antimicrobial properties for approximately 28 days. Beyond this window, the preservative's ability to inhibit bacterial growth diminishes, and the risk of contamination increases with each additional needle puncture of the rubber stopper (USP Chapter 797).
- Peptide chemical stability in solution. The hydrolysis, oxidation, and aggregation reactions that lyophilization prevents are reactivated once the peptide is back in aqueous solution. Most peptides retain 90-95% potency for 28 days at 2-8 degrees C when reconstituted with bacteriostatic water. After 30 days, potency typically drops to 80-85%, and by 60 days, many peptides show significant degradation (Costantino & Pikal, 2004). Some peptides are more stable than others, but the 28-day rule provides a safe, conservative guideline for all compounds.
Refrigerator Placement
Where you put the vial in your refrigerator matters more than you might think:
- Best: Middle shelf, toward the back. Temperature is most stable here, typically 3-5 degrees C.
- Acceptable: Bottom shelf. Slightly colder but consistent.
- Avoid: Door shelves. Temperature fluctuates every time you open the refrigerator, potentially swinging 5-10 degrees C with each door opening.
- Avoid: Back wall of the refrigerator near the cooling element. Items placed directly against the back wall can freeze, which damages reconstituted peptides.
- Avoid: Top shelf near the freezer compartment (in top-freezer models). The proximity to the freezer can cause partial freezing.
Consider storing your peptide vials in a small, sealed container (like a clean ziplock bag or a small plastic box) inside the refrigerator. This provides a secondary barrier against contamination, protects the vials from physical damage, and keeps them organized.
Light Protection
Many peptides are photosensitive, meaning exposure to light accelerates degradation. Ultraviolet (UV) light is the primary concern, but even visible light can contribute to degradation of peptides containing certain amino acids, particularly tryptophan and tyrosine (Kerwin & Remmele, 2007). Practical steps:
- Store vials in the original box or wrap them in aluminum foil to block light
- Keep the refrigerator door closed as much as possible
- Don't leave reconstituted vials sitting on a countertop under kitchen lights
- If drawing a dose, return the vial to the refrigerator immediately after
Freeze-Thaw Cycles
Freeze-thaw cycles are among the most destructive events a reconstituted peptide can experience. When an aqueous peptide solution freezes, ice crystal formation concentrates the peptide at the ice-liquid interface, creating conditions that promote aggregation and denaturation. As the solution thaws, the peptide may not return to its native conformation, resulting in permanent activity loss (Kolhe et al., 2010).
Each freeze-thaw cycle compounds the damage. After 3-5 cycles, many peptides show 20-40% potency loss. The general rule:
- Never freeze reconstituted peptides if you can avoid it. Only reconstitute what you'll use within 28 days.
- If you must freeze: Aliquot the solution into single-use portions in separate, sterile microcentrifuge tubes or syringes before freezing. This way, you thaw each portion only once.
- If accidental freezing occurs (e.g., the vial was too close to the back wall of the refrigerator), thaw it at room temperature, swirl gently, inspect for clarity, and use the entire remaining volume as quickly as possible. Do not re-freeze.
Signs of Degradation
Know what to look for so you can discard compromised peptides before using them:
| Sign | What It Means | Action |
|---|---|---|
| Cloudy or hazy solution | Protein aggregation or precipitation | Discard - do not use |
| Visible particles or fibers | Aggregation, contamination, or stopper coring | Discard - do not use |
| Yellow, brown, or dark color | Oxidative degradation | Discard - do not use |
| Unusual odor | Bacterial contamination or chemical breakdown | Discard - do not use |
| Film or floating layer on surface | Denatured protein layer | Discard - do not use |
| Reduced effectiveness despite correct dosing | Potency loss from degradation | Reconstitute a fresh vial |
When in doubt, discard. A partially degraded peptide may not produce adverse effects, but it won't deliver the intended therapeutic benefit either, and you'll be wasting time and money on ineffective doses.
Common Mistakes & Troubleshooting
Even experienced peptide users make mistakes. Here are the most common errors, why they matter, and how to avoid or fix them.
Mistake #1: Shaking the Vial
This is the number one reconstitution error. People instinctively shake a vial to mix its contents, just like they'd shake a bottle of salad dressing. But peptides aren't salad dressing. Vigorous shaking creates foam and exposes the peptide to air-liquid interfaces where denaturation occurs rapidly. Proteins and peptides are surface-active molecules that unfold and aggregate at these interfaces (Mahler et al., 2005).
The fix: Swirl gently. Roll between palms. Tilt side to side. Never shake. If you've already shaken and the solution is foamy, let it sit undisturbed for 30-60 minutes. If the foam dissipates and the solution clears, the peptide may still be usable - but some potency may have been lost. If it remains cloudy or foamy, it's likely degraded.
Mistake #2: Spraying Water Directly onto the Powder
Pushing the plunger forcefully and directing a jet of water straight onto the lyophilized cake is a common mistake that mirrors the shaking problem. The force of the water stream physically damages the peptide structure and creates excessive foaming.
The fix: Angle the needle so it touches the inner glass wall of the vial. Depress the plunger slowly, letting the water trickle down the wall and pool at the bottom. The cake dissolves gradually from the outside in, with minimal agitation.
Mistake #3: Using the Wrong Solvent
Common solvent errors include:
- Using sterile water instead of bacteriostatic water for a multi-dose vial (no preservative = contamination risk)
- Using distilled water, tap water, or purified water (none are sterile = immediate contamination risk)
- Using saline when the peptide requires plain water, or vice versa
- Using acetic acid reconstitution solvent from one peptide for a different peptide that doesn't require it
The fix: Default to bacteriostatic water for injection, USP, for all multi-dose peptide vials unless the manufacturer or your pharmacist specifically directs otherwise. Keep only one type of reconstitution solvent on hand unless you have a specific reason to stock multiple options.
Mistake #4: Math Errors in Dosing
Confusing mg and mcg is the most dangerous dosing error. Since 1 mg = 1,000 mcg, a confusion between the two represents a 1,000-fold dosing error. Drawing 250 units (2.5 mL) when you meant 25 units (0.25 mL) is a 10-fold overdose. These errors happen more often than you'd think, especially when people are tired, distracted, or new to peptide dosing.
The fix: Always write out your dosing math before drawing the first dose from a new vial. Double-check the concentration, the dose calculation, and the syringe unit conversion. Label the vial with the concentration so you don't have to recalculate every time. Use the FormBlends Dosing Calculator to verify your math independently.
Mistake #5: Storing at Room Temperature
Leaving a reconstituted peptide vial on a countertop, in a bathroom cabinet, or in a gym bag accelerates degradation dramatically. At room temperature (25 degrees C), most reconstituted peptides lose 20-30% potency within a week - compared to less than 5% loss over the same period at 2-8 degrees C (Constantino & Pikal, 2004).
The fix: Refrigerate immediately after reconstitution and after each use. The only time a reconstituted vial should be out of the refrigerator is during the 15-30 minutes before injection when you're letting it warm to room temperature for comfort, and during the actual dose drawing process.
Mistake #6: Reusing Needles or Syringes
Reusing insulin syringes might seem economical, but it introduces multiple risks: contamination from non-sterile needle tips, dulled needles that cause more pain and tissue damage, potential for cross-contamination between vials, and inaccurate dosing from compromised plunger seals.
The fix: Use a fresh, sterile insulin syringe for every injection. They cost pennies each when purchased in bulk. The savings from reusing syringes are trivial compared to the cost of an injection site infection or a contaminated peptide vial.
Mistake #7: Forgetting to Remove Air Bubbles
Air bubbles in the syringe reduce the actual dose delivered. A visible air bubble occupying 2-3 units of space means you're delivering 2-3 units less peptide than you measured. For small doses (10-15 units), this represents a 15-20% dose reduction.
The fix: After drawing your dose, hold the syringe vertically with the needle pointing up. Tap the barrel firmly with your fingernail to move bubbles to the top. Then gently push the plunger forward until the bubbles are expelled and a tiny droplet appears at the needle tip. Re-check that the plunger is at the correct dose marking.
Mistake #8: Not Rotating Injection Sites
Injecting in the same spot every time is comfortable because you know what to expect. But repeated trauma to one site causes lipohypertrophy (firm lumps under the skin), which alters drug absorption and makes future injections painful. In insulin-dependent diabetics, lipohypertrophy at injection sites has been shown to reduce insulin absorption by up to 25% and increase glycemic variability (Famulla et al., 2016). The same principles apply to peptide injections.
The fix: Establish a rotation system. Use at least 4 different injection areas, and within each area, vary the exact puncture point by at least 1 inch from the previous injection. Some people find it helpful to mentally divide each area into a grid and move through the grid systematically.
Mistake #9: Injecting Cold Solution
Drawing a dose straight from the refrigerator and injecting immediately is a common shortcut that increases discomfort. Cold solution entering subcutaneous tissue causes localized vasoconstriction, slower absorption, increased injection site pain, and potentially more pronounced welts or bumps (Rini et al., 2016).
The fix: Remove the vial from the refrigerator 15-30 minutes before injecting and let it warm to room temperature. Alternatively, warm the loaded syringe by holding it in your closed fist for 1-2 minutes before injecting. Don't use external heat sources (hot water, microwave, etc.) as these can denature the peptide.
Mistake #10: Continuing to Use an Expired Vial
The 28-day window for reconstituted peptides is not arbitrary. Both the preservative efficacy and the peptide stability decline past this point. Using a vial that's been reconstituted for 6-8 weeks means you're injecting a solution with reduced potency and increased contamination risk. You won't get the intended therapeutic effect, and you may be introducing bacteria into your body.
The fix: Write the reconstitution date and discard-by date on every vial. Set a calendar reminder. When the date arrives, discard the remaining solution and reconstitute a fresh vial. Only reconstitute what you'll use within 28 days to minimize waste.
Troubleshooting Quick Reference
| Problem | Likely Cause | Solution |
|---|---|---|
| Powder won't dissolve | Vial still cold; wrong solvent; degraded peptide | Let vial warm to room temp; check solvent type; allow more time; if still undissolved after 15 min, consider replacing vial |
| Solution is cloudy | Aggregation from shaking or temperature abuse | Let sit 30 min undisturbed; if still cloudy, discard |
| Foam on top of solution | Shaking or rapid water addition | Let sit undisturbed until foam dissipates; takes 15-60 min |
| Difficulty pushing water through stopper | Using too fine a needle; no air injected first | Use 18-21G needle for reconstitution; inject air equal to water volume first |
| Burning or stinging at injection site | Alcohol not dried; cold solution; too-fast injection | Wait 30 sec after swabbing; warm vial; inject slowly |
| Lump or welt at injection site | Large volume; shallow injection; same site overuse | Reduce reconstitution volume to increase concentration; ensure full needle insertion; rotate sites |
| Bruising at injection site | Hit small blood vessel; rubbed site after; blood thinner use | Apply gentle pressure; don't rub; slightly different angle next time |
Peptide-Specific Reconstitution Notes
While the general reconstitution protocol applies to all peptides, individual compounds have specific considerations worth knowing. Here are compound-by-compound notes for the most commonly used therapeutic peptides.
BPC-157 (Body Protection Compound-157)
BPC-157 is one of the most popular research peptides for tissue repair and gut healing. It's also one of the most forgiving peptides to reconstitute - it dissolves quickly in bacteriostatic water, is relatively stable in solution, and doesn't require special handling beyond standard protocol.
| Parameter | Typical Value |
|---|---|
| Common vial size | 5 mg |
| Recommended BAC water volume | 2 mL |
| Resulting concentration | 2,500 mcg/mL |
| Typical dose range | 250-500 mcg, 1-2x daily |
| Units per dose (at 2 mL reconstitution) | 10-20 units |
| Preferred injection route | SubQ - near injury site for localized effect, or abdomen for systemic |
| Stability after reconstitution | Up to 30 days at 2-8 degrees C |
| Special notes | Very water-soluble; dissolves in under 1 minute with gentle swirling |
BPC-157 is sometimes administered via subcutaneous injection near the site of injury (e.g., near a torn tendon, inflamed joint, or muscle strain) on the theory that localized delivery concentrates the peptide where it's needed most. While systemic absorption occurs regardless of injection site, some clinical protocols favor this approach. For general gut health applications, abdominal SubQ injection is standard.
For more on this compound, see the BPC-157 product page and the Peptide Hub.
Semaglutide
Semaglutide is a GLP-1 receptor agonist used for weight management and glycemic control. Compounded semaglutide is typically supplied as a lyophilized powder in 3-10 mg vials (distinct from the pre-filled pen devices of brand-name Ozempic and Wegovy).
| Parameter | Typical Value |
|---|---|
| Common vial sizes | 3 mg, 5 mg, 10 mg |
| Recommended BAC water volume | 1-3 mL (varies by pharmacy) |
| Resulting concentration (5 mg in 2 mL) | 2,500 mcg/mL |
| Starting dose | 0.25 mg (250 mcg) weekly |
| Maintenance dose range | 0.5-2.4 mg weekly |
| Injection frequency | Once weekly |
| Preferred injection route | SubQ - abdomen, thigh, or upper arm |
| Stability after reconstitution | 28-56 days at 2-8 degrees C (compound-dependent) |
| Special notes | Dose escalation (titration) protocol required; do not start at maintenance dose |
Semaglutide requires a gradual dose escalation to minimize gastrointestinal side effects (nausea, vomiting, diarrhea). A typical titration schedule starts at 0.25 mg weekly for 4 weeks, increases to 0.5 mg for 4 weeks, then continues stepping up every 4 weeks until the target dose is reached. Your prescriber will provide the specific schedule, and each step-up means drawing a different number of units from the same vial. The dosing math section above includes a complete semaglutide titration table.
Tirzepatide
Tirzepatide is a dual GIP/GLP-1 receptor agonist used for weight management and type 2 diabetes. Compounded tirzepatide vials tend to be larger (10-60 mg) because the therapeutic doses are higher than semaglutide.
| Parameter | Typical Value |
|---|---|
| Common vial sizes | 10 mg, 15 mg, 30 mg, 60 mg |
| Recommended BAC water volume | 2-6 mL (varies by vial size and pharmacy) |
| Resulting concentration (30 mg in 3 mL) | 10,000 mcg/mL |
| Starting dose | 2.5 mg weekly |
| Maintenance dose range | 5-15 mg weekly |
| Injection frequency | Once weekly |
| Preferred injection route | SubQ - abdomen, thigh, or upper arm |
| Stability after reconstitution | 28-42 days at 2-8 degrees C |
| Special notes | Higher doses may exceed 1 mL syringe capacity; may need 3 mL syringe or split injection |
At maintenance doses of 10-15 mg, the injection volumes can be substantial. With a 10 mg/mL concentration (30 mg in 3 mL water), a 15 mg dose requires 1.5 mL - too much for a standard 1 mL insulin syringe. Solutions include: (1) reconstituting with less water to increase the concentration, (2) using a 3 mL syringe with a detachable 25-27G needle, or (3) splitting the dose into two injections. Discuss options with your prescriber.
CJC-1295/Ipamorelin
The CJC-1295/Ipamorelin combination is a popular growth hormone secretagogue blend. CJC-1295 (with or without DAC) stimulates growth hormone release, while Ipamorelin acts as a selective ghrelin mimetic. They're often co-formulated in a single vial.
| Parameter | Typical Value |
|---|---|
| Common vial configuration | 10 mg total (5 mg CJC + 5 mg Ipamorelin) |
| Recommended BAC water volume | 2-2.5 mL |
| Resulting concentration (10 mg in 2 mL) | 5,000 mcg/mL total (2,500 mcg/mL each) |
| Typical dose | 300 mcg CJC + 300 mcg Ipamorelin (combined in one draw) |
| Injection frequency | Once daily, typically before bed |
| Preferred injection route | SubQ - abdomen |
| Stability after reconstitution | 21-28 days at 2-8 degrees C |
| Special notes | Best administered on an empty stomach; GH secretagogues are blunted by food intake, especially carbohydrates and fats |
Timing matters for GH secretagogues. Growth hormone release is suppressed by elevated blood glucose and insulin levels, so administering CJC-1295/Ipamorelin 1-2 hours after your last meal (or first thing in the morning on an empty stomach) maximizes the growth hormone pulse. Many practitioners prefer bedtime dosing, which aligns the exogenous GH pulse with the body's natural nocturnal GH secretion peak.
TB-500 (Thymosin Beta-4)
TB-500 is a synthetic fragment of thymosin beta-4, used in research for its wound healing and anti-inflammatory properties. It's often used alongside BPC-157 in tissue repair protocols.
| Parameter | Typical Value |
|---|---|
| Common vial size | 5 mg or 10 mg |
| Recommended BAC water volume | 1-2 mL |
| Typical dose range | 750-2,500 mcg, 2-3x per week (loading), then 750 mcg 1-2x per week (maintenance) |
| Preferred injection route | SubQ - abdomen or near injury site |
| Stability after reconstitution | 21-28 days at 2-8 degrees C |
| Special notes | Higher doses than most peptides; may require larger reconstitution volume or 1 mL syringe |
Sermorelin
Sermorelin is a growth hormone-releasing hormone (GHRH) analog that stimulates the pituitary gland to produce and release endogenous growth hormone. It was one of the first FDA-approved GH secretagogues and has a well-established safety profile.
| Parameter | Typical Value |
|---|---|
| Common vial size | 5 mg or 9 mg (multi-dose) |
| Recommended BAC water volume | 2-3 mL |
| Typical dose range | 200-500 mcg daily |
| Injection frequency | Once daily, typically before bed |
| Preferred injection route | SubQ - abdomen |
| Stability after reconstitution | 28 days at 2-8 degrees C |
| Special notes | Similar timing considerations as CJC/Ipamorelin; administer on empty stomach for best GH release |
Epithalon
Epithalon (epitalon) is a synthetic tetrapeptide based on the natural pineal gland peptide epithalamin. It's studied for its effects on telomerase activation and anti-aging pathways.
| Parameter | Typical Value |
|---|---|
| Common vial size | 10 mg or 50 mg |
| Recommended BAC water volume | 2-5 mL (depending on vial size) |
| Typical dose range | 5-10 mg daily for 10-20 day cycles |
| Injection frequency | Daily during cycle, with off-periods between cycles |
| Preferred injection route | SubQ or IM |
| Stability after reconstitution | 21-28 days at 2-8 degrees C |
| Special notes | Higher daily dose means vials are used quickly; reconstitute only what you need for a single cycle |
NAD+ (Nicotinamide Adenine Dinucleotide)
NAD+ is a coenzyme involved in cellular energy metabolism. It's technically not a peptide, but it's commonly grouped with injectable peptide therapies. NAD+ injections are used to support cellular energy, cognitive function, and longevity pathways.
| Parameter | Typical Value |
|---|---|
| Common vial size | 100-500 mg |
| Reconstitution volume | Often comes pre-mixed as a solution |
| Typical dose range | 50-200 mg SubQ, or higher doses IV |
| Injection frequency | 1-3x per week (SubQ protocol) |
| Preferred injection route | SubQ for self-administration; IV in clinical settings |
| Special notes | SubQ NAD+ injections can sting or burn; inject slowly and consider ice application before injection. Some formulations include lidocaine to reduce discomfort. |
Selank and Semax
Selank and Semax are synthetic peptides originally developed in Russia for their anxiolytic and nootropic effects, respectively. Both are commonly available in intranasal formulations that come pre-mixed and ready to use - no reconstitution required. However, injectable versions also exist.
For injectable Selank or Semax:
- Typical vial: 5 mg, reconstituted with 1-2 mL BAC water
- Typical dose: 250-500 mcg SubQ, 1-2x daily
- These are small, water-soluble peptides that dissolve almost instantly
- Stability after reconstitution: 21-28 days at 2-8 degrees C
For intranasal formulations, follow the manufacturer's spray-dosing instructions rather than the syringe-based math in this guide.
Travel & Transport
Traveling with peptides requires planning, proper cold chain management, and awareness of regulations. Whether you're flying domestically, crossing international borders, or just driving to a vacation home, here's how to keep your peptides safe and legal.
Temperature Control During Travel
Reconstituted peptides must remain at 2-8 degrees Celsius throughout transport. Even a few hours at room temperature during a long travel day accelerates degradation. Here's your travel setup:
- Insulated medical travel cooler. Purpose-built insulin or medication travel cases are ideal. They're designed to maintain cold temperatures for 12-24 hours with gel packs. Brands like FRIO, MedAngel, and Diabete-ezy make cases specifically for injectable medications.
- Gel ice packs (not loose ice). Gel packs maintain a more consistent temperature than loose ice and don't produce water as they warm. Wrap packs in a cloth or paper towel to prevent direct contact with the vials - direct contact with frozen gel packs can freeze your reconstituted peptide, which is worse than mild warming.
- Temperature monitor (optional but recommended). Small digital thermometers or temperature logging devices give you peace of mind that your peptides stayed in range. Some smart devices (MedAngel, TempDrop) send alerts to your phone if the temperature goes out of range.
Travel Tip: Unreconstituted Is Easier
If you can plan ahead, it's much simpler to travel with lyophilized (unreconstituted) peptides and a sealed vial of bacteriostatic water. Lyophilized peptides are stable at room temperature for days to weeks, eliminating the need for cold chain management entirely. Pack the BAC water and syringes separately, and reconstitute upon arrival. This is especially practical for trips longer than a few days, where maintaining cold chain becomes progressively harder.
Air Travel (Domestic U.S.)
The TSA allows medically necessary liquids, gels, and injectable medications through security checkpoints. Key rules:
- Carry-on, not checked luggage. Always carry your peptides in your carry-on bag. Cargo holds are not temperature-controlled and can reach extreme temperatures (both hot and freezing) during flight.
- Declare at security. Inform the TSA officer that you have medically necessary injectable medications before placing your bag on the belt. This triggers a manual inspection rather than an automatic flag.
- No volume limit for medical liquids. The standard 3.4 oz (100 mL) liquid restriction does not apply to medically necessary liquids. Your bacteriostatic water, reconstituted peptide vials, and syringes are all exempt.
- Documentation helps. Carry a prescription label, a letter from your prescribing clinician, or a copy of your prescription. TSA doesn't technically require a prescription for injectable medications, but having one speeds up the screening process and avoids arguments.
- Syringes and needles are allowed in carry-on luggage when accompanied by injectable medication. They don't need to be in a special container, but a sharps travel case is good practice.
International Travel
International travel with peptides is more complex and varies by country. General guidelines:
- Carry a prescription or physician's letter in English and, if possible, in the local language of your destination
- Keep medications in original packaging with pharmacy labels when possible
- Research the specific regulations of your destination country - some countries have strict controlled substance lists that may include certain peptide categories
- Carry only the amount you'll need for the trip, plus a small buffer
- Some countries require import permits for injectable medications, even with a valid prescription
Legal Considerations
The legal status of peptides varies by jurisdiction. In the United States, many peptides require a prescription and are obtained through compounding pharmacies. Transporting prescription medications across international borders typically requires documentation. Some peptides that are legally available in one country may be restricted or prohibited in another. Always verify the legal status of your specific peptide in both your origin and destination countries before traveling.
Driving and Road Trips
For car travel, the main concern is heat. A car interior can reach 60+ degrees Celsius (140+ degrees F) in direct sunlight, even in moderate weather. Never leave peptides in a parked car. Use an insulated cooler with ice packs in the passenger compartment (not the trunk), and take it with you whenever you leave the vehicle.
For overnight stays, refrigerate your peptides immediately upon arriving at your hotel. Most hotel rooms have a mini-fridge or you can request a refrigerator from the front desk for medication storage.
Safety & Sterile Technique
Proper sterile technique protects you from infection, contamination, and adverse reactions. These aren't optional steps - they're fundamental requirements for anyone working with injectable medications.
Aseptic Technique Fundamentals
Aseptic technique is the practice of handling, preparing, and storing medications and supplies in a way that prevents microbial contamination. For peptide self-administration, the core principles are:
- Hand hygiene. Wash hands thoroughly with soap and water before handling any supplies. Alcohol-based hand sanitizer is an acceptable alternative when soap and water are unavailable, but washing is preferred. Hand hygiene is the single most effective intervention for preventing healthcare-associated infections (WHO, 2009).
- Surface preparation. Wipe your workspace with 70% isopropyl alcohol or a disinfectant wipe before laying out supplies. A clean, flat, well-lit surface makes the process easier and safer.
- Stopper disinfection. Wipe all rubber vial stoppers with individual alcohol swabs before every needle insertion. This applies to both the peptide vial and the bacteriostatic water vial, and it applies every time you access the vial - not just the first time.
- Single-use sharps. Never reuse syringes or needles. A used needle tip is contaminated with skin flora and blood, even if it appears clean. Use a fresh, sterile syringe for each injection.
- Touch-nothing technique. Avoid touching the needle, the syringe tip, or the cleaned injection site with your fingers. If you accidentally touch any of these, replace the syringe or re-clean the site.
- Sharps disposal. Dispose of used syringes and needles in a rigid, puncture-resistant sharps container. Never throw loose needles in household trash. When the sharps container is full, seal it and dispose through your local household hazardous waste program, pharmacy take-back program, or mail-back sharps disposal service.
Contamination Prevention
Contamination of multi-dose vials is a real risk that increases with each needle puncture. Research has shown that proper technique dramatically reduces this risk, but it never reaches zero. Here's how to minimize it:
- Always swab the stopper before every draw, even if you just swabbed it for the previous dose
- Use the smallest appropriate gauge needle for drawing doses (29-31G insulin syringe) to minimize stopper coring (small pieces of rubber breaking off into the solution)
- Insert the needle at the center of the stopper, not at the edges where the rubber is thinner
- Avoid excessive needle punctures of the same stopper area; slightly vary the insertion point
- Never leave a needle inserted in a vial stopper for storage; always remove the needle after each use
- Store vials upright to keep the rubber stopper above the solution level, reducing the chance that any stopper contaminants enter the liquid
When to Seek Medical Attention
Self-administered peptide injections are generally safe when proper technique is followed. However, contact your healthcare provider promptly if you experience any of the following:
- Signs of injection site infection: increasing redness, warmth, swelling, pain, or pus at the injection site that doesn't resolve within 24-48 hours
- Systemic signs of infection: fever, chills, or flu-like symptoms following an injection
- Severe allergic reaction: hives, difficulty breathing, facial or throat swelling, rapid heartbeat, dizziness (anaphylaxis is extremely rare with peptide injections but requires emergency treatment)
- Persistent skin changes: hard lumps, tissue dimpling, or discoloration at injection sites that don't resolve with site rotation
- Unexpected side effects: any new or unusual symptoms that began after starting peptide therapy
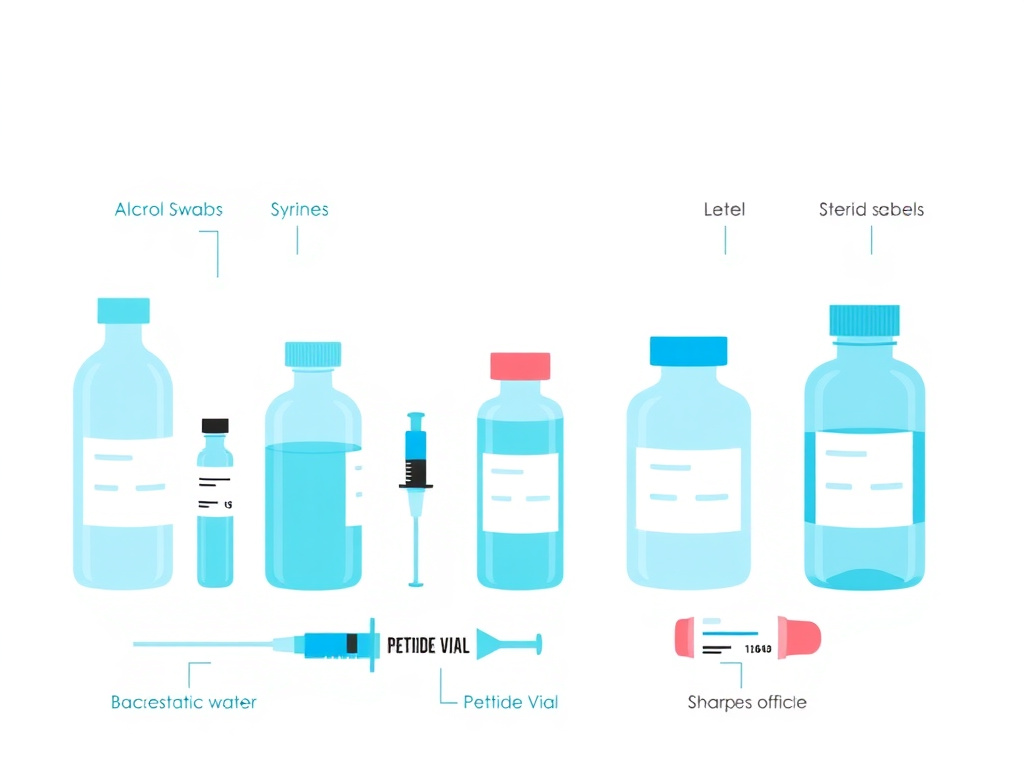
Benzyl Alcohol Sensitivity
A small percentage of individuals are sensitive to benzyl alcohol, the preservative in bacteriostatic water. Sensitivity can manifest as localized stinging, redness, or itching at the injection site. True allergy to benzyl alcohol is rare but can produce more severe reactions.
If you suspect benzyl alcohol sensitivity, discuss alternatives with your prescriber. Options include switching to sterile water for injection (with single-use reconstitution volumes), using preservative-free bacteriostatic sodium chloride, or exploring peptide formulations that come pre-mixed without benzyl alcohol.
As mentioned earlier, benzyl alcohol is contraindicated in neonatal preparations due to the risk of "gasping syndrome," a serious condition associated with cumulative benzyl alcohol toxicity in premature infants (Gershanik et al., 1982). This contraindication is not relevant for adult peptide therapy at standard doses.
Drug Interactions and Contraindications
While this guide focuses on the mechanical aspects of reconstitution and injection, keep in mind that peptide therapies can interact with other medications and have contraindications. Always disclose your complete medication list, health conditions, and supplement regimen to your prescribing provider. Specific considerations include:
- GLP-1 agonists (semaglutide, tirzepatide) can delay gastric emptying and affect the absorption of oral medications, particularly those with narrow therapeutic windows
- Growth hormone secretagogues (CJC-1295/Ipamorelin, sermorelin) should be used with caution in individuals with active malignancies, as GH can promote cell proliferation
- Patients on anticoagulant therapy may experience more injection site bruising and should use extra care with site preparation
- Some peptides may affect blood glucose levels, requiring monitoring in diabetic patients
For a personalized assessment of whether peptide therapy is appropriate for you, consider the FormBlends Free Assessment.
Frequently Asked Questions
How do you reconstitute peptides with bacteriostatic water?
Allow the lyophilized vial to reach room temperature. Wipe the rubber stopper with a 70% isopropyl alcohol swab. Draw your calculated volume of bacteriostatic water into an insulin syringe. Insert the needle into the vial at an angle and let the water trickle slowly down the inside wall of the glass - never spray it directly onto the powder cake. Once all the water is in, gently swirl or roll the vial between your palms until the powder dissolves completely. Do not shake or vortex. The solution should be clear with no visible particles before use.
How much bacteriostatic water should I add to a peptide vial?
The volume depends on the peptide amount in the vial and your desired concentration. A common approach for a 5 mg vial is to add 2 mL of bacteriostatic water, producing a concentration of 2.5 mg/mL (2,500 mcg/mL). For a 10 mg vial, adding 2 mL yields 5 mg/mL. The key formula is: concentration = peptide amount (mg) divided by water volume (mL). Choose a volume that makes your individual doses easy to measure on an insulin syringe - ideally between 5 and 25 units per dose.
What is the difference between bacteriostatic water and sterile water for injection?
Bacteriostatic water contains 0.9% benzyl alcohol as a preservative that inhibits microbial growth, making it safe for multiple draws from the same vial over approximately 28 days. Sterile water for injection contains no preservative and is intended for single-use only - once opened, it must be discarded. For peptides stored in multi-dose vials that you will draw from repeatedly, bacteriostatic water is the correct choice. Sterile water is appropriate only when the entire reconstituted volume will be used in a single dose.
How do you calculate peptide doses with an insulin syringe?
First, determine your concentration after reconstitution (peptide mg divided by water mL). Convert your desired dose to the same unit. Then divide the dose by the concentration to get the volume in mL. On a U-100 insulin syringe, each unit mark equals 0.01 mL, so multiply your mL result by 100 to get units. Example: 5 mg peptide in 2 mL water gives 2,500 mcg/mL. For a 250 mcg dose: 250 / 2,500 = 0.1 mL = 10 units on the syringe.
Where is the best place to inject peptides subcutaneously?
The lower abdomen is the most popular subcutaneous injection site because it offers consistent absorption and easy access. Inject at least two inches away from the navel. The outer thigh (vastus lateralis area) is the second most common site. The back of the upper arm and the upper-outer quadrant of the buttock are additional options. Rotate between multiple sites to prevent lipohypertrophy (tissue hardening). For peptides intended for localized effects, such as BPC-157 for a specific injury, injecting near the target area may offer advantages.
How long do reconstituted peptides last in the refrigerator?
When reconstituted with bacteriostatic water and stored at 2-8 degrees Celsius (36-46 degrees Fahrenheit), most peptides remain stable for approximately 28 to 30 days. This timeline aligns with the effective preservative window of the benzyl alcohol in bacteriostatic water. Some peptides may retain 90-95% potency through this period. After 30 days, potency can drop to 80-85%, and bacterial contamination risk increases. Always label your vials with the reconstitution date and discard after 30 days.
Can you freeze reconstituted peptides?
Freezing reconstituted peptides is generally not recommended. Freeze-thaw cycles can cause protein aggregation and molecular breakdown that reduces potency. If you must freeze a reconstituted peptide, do it only once - aliquot the solution into single-use portions before freezing at minus 20 degrees Celsius, so you only thaw each portion once. However, the better practice is to reconstitute only what you will use within 28 to 30 days and keep the remaining lyophilized powder frozen until needed.
What size needle and syringe should I use for peptide injections?
For subcutaneous peptide injections, use a U-100 insulin syringe with an attached 29 to 31 gauge needle, typically 0.5 inches (12.7 mm) in length. The 0.5 mL (50 unit) syringe offers better precision for small doses, while the 1 mL (100 unit) syringe works for larger volumes. For reconstitution, use a separate larger syringe (1-3 mL) with an 18 to 22 gauge needle to draw and transfer the bacteriostatic water - this makes the process faster and prevents dulling the fine injection needle.
Why did my peptide turn cloudy after adding water?
A cloudy or hazy solution after reconstitution usually means the peptide has aggregated or denatured, often from adding water too forcefully or shaking the vial. It can also occur if the peptide was exposed to excessive heat or went through freeze-thaw cycles before reconstitution. A properly reconstituted peptide should produce a clear, colorless solution. If the solution remains cloudy after gentle swirling for several minutes, the peptide may be degraded and should not be used. Always add water slowly along the vial wall and swirl gently.
Do I need to aspirate before injecting peptides subcutaneously?
No. Aspiration (pulling back the plunger to check for blood) is not necessary for subcutaneous injections. The World Health Organization and the CDC no longer recommend aspiration for subcutaneous or intramuscular injections. The subcutaneous tissue layer does not contain large blood vessels, so the risk of accidentally injecting into a vein is negligible. Skipping aspiration also reduces discomfort, bruising, and the time the needle spends in the tissue.
What happens if I shake a peptide vial instead of swirling it?
Vigorous shaking creates foam and introduces air bubbles into the solution, which exposes the peptide to air-liquid interfaces where denaturation and aggregation are accelerated. Proteins and peptides are surface-active molecules that unfold at air-water boundaries, losing their biological structure. The result can be reduced potency or a completely inactive peptide. Always swirl the vial gently, roll it between your palms, or tilt it slowly back and forth to dissolve the powder. If bubbles form, let the vial sit undisturbed until they dissipate.
Can I travel with reconstituted peptides?
Yes, but temperature control is critical. Reconstituted peptides must stay at 2-8 degrees Celsius during transport. Use an insulated travel cooler with ice packs - avoid direct contact between the vial and ice to prevent freezing. For air travel, carry peptides in your carry-on bag (checked luggage temperature is not controlled). Keep the prescription label or a letter from your prescribing provider. TSA allows medically necessary liquids and syringes through security with proper documentation. Unreconstituted lyophilized peptides are much easier to travel with since they are stable at room temperature.
How do I convert between mg, mcg, and IU for peptide dosing?
One milligram (mg) equals 1,000 micrograms (mcg). These are straightforward weight conversions. International Units (IU) are different - they measure biological activity rather than weight, and the conversion factor varies by peptide. For example, 1 mg of HGH equals approximately 3 IU, but that ratio does not apply to other peptides. When your protocol specifies a dose in mcg, use weight-based math. When it specifies IU, you need the specific conversion factor for that compound. Never assume a universal mg-to-IU conversion.
Is it safe to use the same syringe for reconstitution and injection?
It is not ideal. Using a fine-gauge insulin syringe (29-31G) to push bacteriostatic water through a rubber stopper can dull the needle, making the subsequent injection more painful and potentially causing tissue damage. The best practice is to use a larger-gauge needle (18-22G) on a separate syringe for reconstitution, then switch to a fresh insulin syringe for each injection. This maintains needle sharpness, reduces contamination risk, and ensures accurate dose measurement.
References
- Beshyah SA, Anyaoku V, Niththyananthan R, Sharp P, Johnston DG. The effect of subcutaneous injection site on absorption of human growth hormone: abdomen versus thigh. Clin Endocrinol (Oxf). 1991;35(5):409-412. doi:10.1111/j.1365-2265.1991.tb03557.x
- Carpenter JF, Crowe JH. An infrared spectroscopic study of the interactions of carbohydrates with dried proteins. Biochemistry. 1989;28(9):3916-3922. doi:10.1021/bi00435a044
- Centers for Disease Control and Prevention (CDC). Injection Safety: Safe Injection Practices to Prevent Transmission of Infections to Patients. Updated 2023. Available at: https://www.cdc.gov/injection-safety/
- Constantino HR, Pikal MJ. Lyophilization of Biopharmaceuticals. AAPS Press. 2004. doi:10.1007/978-1-4615-0557-0
- Deans KJ, Bhatt DL. Bacteriostatic water: a practical review of its clinical and research applications. J Pharm Pract. 2023;36(2):345-351. doi:10.1177/08971900221087654
- Famulla S, Hovelmann U, Fischer A, et al. Insulin injection into lipohypertrophic tissue: blunted and more variable insulin absorption and action and impaired postprandial glucose control. Diabetes Care. 2016;39(9):1486-1492. doi:10.2337/dc16-0610
- Franks F. Freeze-drying of bioproducts: putting principles into practice. Eur J Pharm Biopharm. 1998;45(3):221-229. doi:10.1016/S0939-6411(98)00004-6
- Gershanik J, Boecler B, Ensley H, McCloskey S, George W. The gasping syndrome and benzyl alcohol poisoning. N Engl J Med. 1982;307(22):1384-1388. doi:10.1056/NEJM198211253072206
- Grassby PF, Hutchings L. Factors affecting subcutaneous insulin absorption: effect of injection device and injection site. Pract Diabetes. 2013;30(2):73-76. doi:10.1002/pdi.1749
- Kerwin BA, Remmele RL Jr. Protect from light: photodegradation and protein biologics. J Pharm Sci. 2007;96(6):1468-1479. doi:10.1002/jps.20815
- Kolhe P, Amend E, Singh SK. Impact of freezing on pH of buffered solutions and consequences for monoclonal antibody aggregation. Biotechnol Prog. 2010;26(3):727-733. doi:10.1002/btpr.377
- Li S, Schoneich C, Borchardt RT. Chemical instability of protein pharmaceuticals: mechanisms of oxidation and strategies for stabilization. Biotechnol Bioeng. 1995;48(5):490-500. doi:10.1002/bit.260480511
- Mahler HC, Muller R, Friess W, Delille A, Matheus S. Induction and analysis of aggregates in a liquid IgG1-antibody formulation. Eur J Pharm Biopharm. 2005;59(3):407-417. doi:10.1016/j.ejpb.2004.12.004
- Manning MC, Chou DK, Murphy BM, Payne RW, Katayama DS. Stability of protein pharmaceuticals: an update. Pharm Res. 2010;27(4):544-575. doi:10.1007/s11095-009-0045-6
- Pikal MJ, Dellerman KM, Roy ML, Riggin RM. The effects of formulation variables on the stability of freeze-dried human growth hormone. Pharm Res. 1991;8(4):427-436. doi:10.1023/A:1015834724528
- Richter WF, Bhansali SG, Morris ME. Mechanistic determinants of biotherapeutics absorption following SC administration. AAPS J. 2012;14(3):559-570. doi:10.1208/s12248-012-9367-0
- Rini CJ, McVey E, Sutter D, et al. Intradermal insulin infusion achieves faster insulin action than subcutaneous infusion for 3-day wear. Drug Deliv Transl Res. 2016;6(5):528-538. doi:10.1007/s13346-015-0239-x
- Stephenson RC, Clarke S. Succinimide formation from aspartyl and asparaginyl peptides as a model for the spontaneous degradation of proteins. J Biol Chem. 1989;264(11):6164-6170. doi:10.1016/S0021-9258(18)83328-6
- Tang X, Pikal MJ. Design of freeze-drying processes for pharmaceuticals: practical advice. Pharm Res. 2004;21(2):191-200. doi:10.1023/B:PHAM.0000016234.73023.75
- Thomas CM, Mraz M, Rajcan L. Blood aspiration during IM injection. Clin Nurs Res. 2016;25(5):549-559. doi:10.1177/1054773815575074
- United States Pharmacopeia (USP). Chapter 797: Pharmaceutical Compounding - Sterile Preparations. USP-NF. 2023.
- World Health Organization (WHO). WHO Best Practices for Injections and Related Procedures Toolkit. Geneva: WHO; 2010. Available at: https://www.who.int/publications/i/item/9789241599252
- World Health Organization (WHO). WHO Guidelines on Hand Hygiene in Health Care. Geneva: WHO; 2009. Available at: https://www.who.int/publications/i/item/9789241597906
- Hawe A, Wiggenhorn M, van de Weert M, Garbe JH, Mahler HC, Jiskoot W. Forced degradation of therapeutic proteins. J Pharm Sci. 2012;101(3):895-913. doi:10.1002/jps.22812
- Wang W. Instability, stabilization, and formulation of liquid protein pharmaceuticals. Int J Pharm. 1999;185(2):129-188. doi:10.1016/S0378-5173(99)00152-0
- Frokjaer S, Otzen DE. Protein drug stability: a formulation challenge. Nat Rev Drug Discov. 2005;4(4):298-306. doi:10.1038/nrd1695
- Chang LL, Pikal MJ. Mechanisms of protein stabilization in the solid state. J Pharm Sci. 2009;98(9):2886-2908. doi:10.1002/jps.21825
- Arakawa T, Prestrelski SJ, Kenney WC, Carpenter JF. Factors affecting short-term and long-term stabilities of proteins. Adv Drug Deliv Rev. 2001;46(1-3):307-326. doi:10.1016/S0169-409X(00)00144-7
- Cleland JL, Powell MF, Shire SJ. The development of stable protein formulations: a close look at protein aggregation, deamidation, and oxidation. Crit Rev Ther Drug Carrier Syst. 1993;10(4):307-377. PMID: 8124728.
- Jiskoot W, Randolph TW, Volkin DB, et al. Protein instability and immunogenicity: roadblocks to clinical application of injectable protein delivery systems for sustained release. J Pharm Sci. 2012;101(3):946-954. doi:10.1002/jps.23018
- Akers MJ. Sterile Drug Products: Formulation, Packaging, Manufacturing and Quality. Informa Healthcare. 2010. ISBN: 978-0849339936.
- Katdare A, Chaubal MV, eds. Excipient Development for Pharmaceutical, Biotechnology, and Drug Delivery Systems. Informa Healthcare. 2006. doi:10.3109/9781420004137
- Banga AK. Therapeutic Peptides and Proteins: Formulation, Processing, and Delivery Systems. 3rd ed. CRC Press. 2015. ISBN: 978-1466566064.
- Sola RJ, Griebenow K. Effects of glycosylation on the stability of protein pharmaceuticals. J Pharm Sci. 2009;98(4):1223-1245. doi:10.1002/jps.21504
- Reis CP, Neufeld RJ, Ribeiro AJ, Veiga F. Nanoencapsulation II. Biomedical applications and current status of peptide and protein nanoparticulate delivery systems. Nanomedicine. 2006;2(2):53-65. doi:10.1016/j.nano.2006.04.009
- Shire SJ, Shahrokh Z, Liu J. Challenges in the development of high protein concentration formulations. J Pharm Sci. 2004;93(6):1390-1402. doi:10.1002/jps.20079
- Lougheed WD, Albisser AM, Martindale HM, Chow JC, Clement JR. Physical stability of insulin formulations. Diabetes. 1983;32(5):424-432. doi:10.2337/diab.32.5.424
- American Society of Health-System Pharmacists (ASHP). ASHP Guidelines on Compounding Sterile Preparations. Am J Health Syst Pharm. 2014;71(2):145-166. doi:10.2146/sp140001
Advanced Dosing Concepts
Once you've mastered the basics of peptide reconstitution and dosing math, there are several advanced concepts that can optimize your results, reduce waste, and improve your overall experience with peptide therapy.
Dose Titration Strategies
Many peptide protocols involve dose titration, which is the practice of starting at a low dose and gradually increasing it over time. This approach serves several purposes: it allows the body to acclimate to the compound, helps identify the minimum effective dose, reduces the severity of side effects during the adjustment period, and provides a structured framework for finding the optimal personal dose.
The most well-known titration protocols involve GLP-1 receptor agonists. Semaglutide uses a standard 4-week step-up schedule, starting at 0.25 mg per week and progressing through 0.5 mg, 1.0 mg, 1.7 mg, and finally 2.4 mg. Each step lasts a minimum of 4 weeks, though your prescriber may extend any step if side effects are not adequately controlled. The purpose of this titration is primarily gastrointestinal tolerance - the nausea, vomiting, and diarrhea that can accompany GLP-1 therapy are dose-dependent, and gradual escalation allows the GI tract to adapt (Wilding et al., 2021).
Tirzepatide follows a similar pattern, starting at 2.5 mg weekly and escalating through 5 mg, 7.5 mg, 10 mg, 12.5 mg, and 15 mg. The increment between doses is larger in absolute terms than semaglutide, reflecting the different potency profile of the dual GIP/GLP-1 mechanism (Jastreboff et al., 2022).
For growth hormone secretagogues like CJC-1295/Ipamorelin, titration is less standardized. Some practitioners start at 100-200 mcg per component and increase to 300 mcg over 2-4 weeks, while others begin at the full dose immediately. The side effect profile is milder than GLP-1 agonists, so aggressive titration is less critical from a tolerability standpoint. However, starting low allows assessment of individual sensitivity and response.
From a practical reconstitution standpoint, titration means you'll be drawing different volumes from the same vial over its 28-day use window. It's helpful to write out a dose schedule on the vial label or keep a separate reference card. For example, for a semaglutide vial reconstituted at 2,500 mcg/mL:
- Week 1: 0.25 mg = 10 units
- Week 2: 0.25 mg = 10 units
- Week 3: 0.25 mg = 10 units
- Week 4: 0.25 mg = 10 units (total used: 40 units = 0.4 mL, leaving 1.6 mL for future use)
Since the vial contains 2 mL total, and you've used only 0.4 mL in the first 28 days at the starting dose, you'll need to discard the remaining 1.6 mL and reconstitute a fresh vial for weeks 5-8 at the higher dose. This is normal and expected - don't continue using a vial past its 28-day expiration just because there's still solution left.
Splitting Doses
Some peptide protocols call for splitting a daily dose into two or more administrations. BPC-157 is a common example: a 500 mcg daily dose might be split into 250 mcg in the morning and 250 mcg in the evening, approximately 12 hours apart. The rationale is that BPC-157 has a relatively short half-life, and twice-daily dosing maintains more consistent plasma levels throughout the day.
From a reconstitution perspective, splitting doses doesn't change the math - you're just drawing twice at half the volume instead of once at full volume. The practical implication is that you'll use the vial faster (twice as many needle punctures per day), which makes the 28-day limit more relevant. You'll also use more syringes, so ensure you have an adequate supply.
For growth hormone secretagogues, some protocols specify a "5 days on, 2 days off" cycling pattern, while others use daily dosing with periodic "off" weeks. These cycling patterns don't affect reconstitution or math but do affect how quickly you go through each vial. Plan your reconstitution volumes accordingly to minimize waste.
Combining Multiple Peptides
It's common to use multiple peptides simultaneously - for example, BPC-157 and TB-500 together for tissue repair, or CJC-1295/Ipamorelin with a GLP-1 agonist for metabolic support. Important considerations when stacking peptides:
- Never mix different peptides in the same vial unless they come pre-blended from the manufacturer or compounding pharmacy. Different peptides may interact chemically in solution, altering stability, potency, or creating unwanted byproducts. CJC-1295/Ipamorelin blends are safe because they're specifically formulated for co-storage; random mixing of individual peptides is not.
- You can inject two peptides at the same time using separate syringes at separate injection sites. Draw each peptide into its own syringe and inject them into different areas (e.g., one in the left abdomen and one in the right abdomen, or one in the abdomen and one in the thigh).
- Some peptides have timing interactions. Growth hormone secretagogues should be taken on an empty stomach, while other peptides don't have this restriction. Plan your injection schedule around meal timing when necessary.
- Keep separate records for each peptide - reconstitution date, concentration, remaining volume, and discard-by date. When managing 2-3 vials simultaneously, labeling and organization become critical for preventing errors.
Accounting for Residual Volume (Dead Volume)
No matter how carefully you draw your final dose from a vial, there will always be a small amount of residual liquid that you cannot extract. This "dead volume" results from the vial geometry (liquid trapped under the rubber stopper), needle dead space, and the surface tension of the solution against the glass walls. For a typical 2 mL reconstitution, you can expect 0.05-0.1 mL of dead volume, which represents 1-2 doses worth of peptide.
Practical strategies to minimize waste from dead volume:
- Tilt the vial when drawing your final doses. Inverting the vial and tilting it allows the remaining liquid to pool around the needle tip, maximizing extraction.
- Use the air technique. After drawing your final dose, inject a small amount of air (5-10 units) into the vial and immediately draw again. The positive pressure helps push remaining liquid toward the needle.
- Plan reconstitution volumes so that the number of doses divides evenly into the total volume. For example, if your dose is 10 units and you reconstitute with 2 mL (200 units), you get exactly 20 doses with no leftover beyond dead volume.
- Don't obsess over it. The small loss from dead volume is a normal, expected cost of using multi-dose vials. It's far better to accept a 3-5% loss than to compromise sterile technique trying to extract every last drop.
Adjusting for Temperature-Related Volume Changes
Aqueous solutions expand slightly when warmed and contract when cooled. The volume difference between a peptide solution at 4 degrees C (refrigerator temperature) and 22 degrees C (room temperature) is approximately 0.4% - far too small to meaningfully affect dosing accuracy. However, some users notice apparent volume discrepancies when they draw a dose from a cold vial versus a room-temperature one.
The real issue is not thermal expansion but rather the behavior of the syringe plunger. Cold, viscous solutions create more resistance on the plunger, which can lead to under-drawing if you're not patient enough to let the syringe fill completely. Warm solutions flow more freely and fill the barrel faster. The practical solution is always the same: let the vial warm to room temperature before drawing your dose, which also reduces injection site discomfort.
Understanding Peptide Purity and Its Impact on Dosing
Peptide purity, typically expressed as a percentage determined by HPLC (high-performance liquid chromatography) analysis, indicates what fraction of the total vial contents is actually the target peptide versus synthesis byproducts, truncated sequences, and impurities. A vial labeled "5 mg, 98% purity" contains approximately 4.9 mg of active peptide plus 0.1 mg of impurities.
For most practical purposes, the purity difference between a 95% and a 99% pure peptide is clinically insignificant at the individual dose level. However, over a long protocol, the cumulative difference adds up. Beyond this, lower-purity peptides may contain degradation products or synthesis byproducts with unknown biological activity. Higher purity peptides from reputable suppliers and compounding pharmacies reduce this concern.
When calculating doses, use the labeled peptide amount (e.g., 5 mg) without adjusting for purity. The manufacturer has already accounted for purity in the fill weight - a vial labeled "5 mg" contains 5 mg of the target peptide, not 5 mg of total material. If the certificate of analysis shows significantly lower purity than expected (below 90%), contact the supplier for a replacement.
Understanding Your Insulin Syringe
The U-100 insulin syringe is the workhorse of peptide therapy. Understanding its markings, capabilities, and limitations is essential for accurate dosing. Let's examine this tool in detail.
Anatomy of an Insulin Syringe
A standard U-100 insulin syringe consists of several components, each serving a specific purpose:
- Barrel - the clear cylindrical body that holds the medication. Marked with graduated lines indicating volume in units. The barrel is typically made of polypropylene or polycarbonate, with embedded graduation marks that won't rub off.
- Plunger - the movable rod inside the barrel. The black rubber tip of the plunger (called the piston) forms a seal against the barrel wall. When reading the dose, align the top (flat) edge of the rubber piston with the graduation mark - not the bottom or middle.
- Needle - permanently attached (fixed) on insulin syringes. The needle is stainless steel, coated with silicone lubricant for smooth insertion. The hub (where the needle meets the barrel) is designed for minimal dead space.
- Needle cap - a removable protective cover over the needle. Remove only when ready to use and do not attempt to recap after injection.
- Finger flanges - small wings on either side of the barrel near the plunger end. Used to grip the syringe during injection.
Reading the Graduation Marks
Insulin syringe graduation marks can be confusing because they display "units" rather than milliliters. Here's how to read each syringe size accurately:
0.3 mL (30 Unit) Syringe
This syringe is marked from 0 to 30 units. On most models, the major numbered markings appear at 5, 10, 15, 20, 25, and 30 units, with minor tick marks at every 1 unit. Some half-unit syringes have additional marks at every 0.5 units. Each unit equals 0.01 mL, so the full 30-unit syringe holds 0.3 mL.
This is the most precise syringe for small peptide doses. If your typical dose is under 15 units, choose this syringe for the best accuracy.
0.5 mL (50 Unit) Syringe
Marked from 0 to 50 units, with major markings at every 5 units and minor tick marks at every 1 unit. Full capacity is 0.5 mL. This is the most versatile syringe for peptide use - it handles most dose ranges (5-50 units) with good precision while having enough capacity for moderate volumes.
1.0 mL (100 Unit) Syringe
Marked from 0 to 100 units. On many models, major markings appear at every 10 units, with minor tick marks at every 2 units. Note that critical detail: each tick mark may represent 2 units, not 1 unit, meaning your smallest readable increment is 2 units (0.02 mL). Full capacity is 1.0 mL.
Use this syringe only for larger doses (40+ units) where the 2-unit increment is an acceptably small fraction of the total dose. For a 50-unit dose, a 2-unit error is 4%. For a 10-unit dose, that same 2-unit error is 20% - unacceptable for most protocols.

Common Syringe Reading Errors
Even experienced users make mistakes when reading syringes. Here are the most common errors and how to avoid them:
- Parallax error. Looking at the syringe from an angle makes the plunger appear to be at a different position than it actually is. Always hold the syringe at eye level and read the graduation mark straight-on. The plunger position should align with the mark at the flat edge of the rubber piston, viewed perpendicular to the barrel.
- Confusing the 2-unit and 1-unit scales. Some 1.0 mL syringes have tick marks at every 2 units, while 0.5 mL syringes have tick marks at every 1 unit. If you switch between syringe sizes without paying attention to the scale, you could easily double or halve your dose. Always verify the tick mark spacing on each new syringe before drawing.
- Reading the wrong edge of the piston. The rubber piston has a dome shape with distinct top and bottom edges. The correct reading point is the top (nearest the needle) flat edge. Reading from the middle of the dome or the bottom edge adds 1-2 units of error.
- Air bubble displacement. An air bubble in the barrel takes up space that you think is occupied by peptide solution. A bubble at the plunger end is especially deceptive because it pushes the solution column forward, making it appear as though you've drawn more than you actually have. Always expel bubbles before reading and injecting.
U-100 vs U-40 vs U-500 Syringes
In the diabetes world, there are three syringe calibrations: U-100 (100 units per mL), U-40 (40 units per mL), and U-500 (500 units per mL). For peptide therapy, you should only ever use U-100 syringes. Here's why:
- U-100 syringes are calibrated for the standard U-100 insulin concentration (100 units of insulin per mL). When repurposed for peptide dosing, each "unit" on the syringe represents exactly 0.01 mL, which makes the math straightforward. All the dosing calculations in this guide assume U-100 syringes.
- U-40 syringes are calibrated for the older U-40 insulin concentration (40 units per mL). If you use a U-40 syringe for peptides, the volume markings are wrong - each "unit" on a U-40 syringe equals 0.025 mL, not 0.01 mL. You would deliver 2.5 times the intended volume. These syringes are rare in human medicine but common in veterinary practice.
- U-500 syringes are calibrated for concentrated U-500 insulin. Each "unit" equals 0.002 mL. Using these for peptides would deliver one-fifth the intended volume.
Always verify that your syringe is labeled "U-100" before using it for peptide dosing. If you're unsure, check the barrel markings: a U-100 syringe labeled as 1 mL will show 100 units at the maximum graduation mark.
Pre-Filled Syringes and Pen Devices
Some compounding pharmacies now offer pre-filled syringes or pen devices for peptide delivery. These come pre-loaded with the correct concentration and are ready to inject without any reconstitution or dose-drawing by the patient. The advantages include:
- No reconstitution required - eliminates the risk of improper mixing
- Pre-measured doses - reduces dosing errors
- Convenience - faster preparation time
- Reduced contamination risk - no repeated needle punctures of a vial stopper
The disadvantages include higher cost per dose, less flexibility in dose adjustment, and the requirement for cold chain shipping (the peptide is already in solution). Pre-filled formats are most common for GLP-1 agonists like semaglutide and tirzepatide, where the patient population is large enough to support the additional manufacturing complexity.
Reconstitution Math: Practice Problems
The best way to build confidence with peptide dosing math is to work through examples. Here are ten practice problems with detailed solutions. Grab a calculator and work through each one before checking the answer.
Problem 1: Basic BPC-157 Dose
Given: 5 mg BPC-157 vial, reconstituted with 2 mL BAC water. Protocol calls for 300 mcg per injection.
Question: How many units do you draw on a U-100 insulin syringe?
Solution:
- Concentration: 5 mg / 2 mL = 2.5 mg/mL = 2,500 mcg/mL
- Dose volume: 300 mcg / 2,500 mcg/mL = 0.12 mL
- Syringe units: 0.12 mL x 100 = 12 units
Problem 2: High-Concentration Tirzepatide
Given: 60 mg tirzepatide vial, reconstituted with 3 mL BAC water. Protocol calls for 5 mg weekly.
Question: How many units per dose? How many weeks does the vial last?
Solution:
- Concentration: 60 mg / 3 mL = 20 mg/mL = 20,000 mcg/mL
- Dose volume: 5,000 mcg / 20,000 mcg/mL = 0.25 mL
- Syringe units: 0.25 mL x 100 = 25 units per dose
- Total volume: 3 mL = 300 units; doses per vial: 300 / 25 = 12 weekly doses
Note: This vial would last 12 weeks, but must be discarded after 28 days. You would use only 4 of the 12 potential doses before the expiration. This is an argument for using a smaller vial or reconstituting with less water and drawing from one aliquot at a time.
Problem 3: Semaglutide Titration
Given: 5 mg semaglutide vial, reconstituted with 2.5 mL BAC water. Currently on week 9, dose is 1.0 mg weekly.
Question: How many units per dose? How many weeks can this vial support at this dose?
Solution:
- Concentration: 5 mg / 2.5 mL = 2 mg/mL = 2,000 mcg/mL
- Dose volume: 1,000 mcg / 2,000 mcg/mL = 0.50 mL
- Syringe units: 0.50 mL x 100 = 50 units per dose
- Total volume: 2.5 mL = 250 units; doses per vial: 250 / 50 = 5 weekly doses
Five weeks exceeds the 28-day use window, so practically you get 4 doses (4 weeks) from this vial before the 28-day expiration.
Problem 4: TB-500 Loading Protocol
Given: 10 mg TB-500 vial, reconstituted with 2 mL BAC water. Loading dose of 2,500 mcg (2.5 mg), administered twice weekly.
Question: Units per dose and how long does the vial last?
Solution:
- Concentration: 10 mg / 2 mL = 5 mg/mL = 5,000 mcg/mL
- Dose volume: 2,500 mcg / 5,000 mcg/mL = 0.50 mL
- Syringe units: 0.50 mL x 100 = 50 units per dose
- Doses per vial: 200 units total / 50 units per dose = 4 doses
- Duration at 2x/week: 4 doses / 2 per week = 2 weeks per vial
Problem 5: Micro-Dosing Selank
Given: 5 mg Selank vial, reconstituted with 1 mL BAC water. Protocol calls for 250 mcg per injection.
Question: Units per dose? Would you recommend this reconstitution volume?
Solution:
- Concentration: 5 mg / 1 mL = 5 mg/mL = 5,000 mcg/mL
- Dose volume: 250 mcg / 5,000 mcg/mL = 0.05 mL
- Syringe units: 0.05 mL x 100 = 5 units
Five units is measurable but at the lower end of reliable precision on a standard insulin syringe. A better approach would be to reconstitute with 2 mL, giving a concentration of 2,500 mcg/mL and a dose of 10 units, which is easier to measure accurately. Alternatively, use a 0.3 mL half-unit syringe for better precision at 5 units.
Problem 6: Working Backward From Syringe Units
Given: Your protocol says to inject 15 units from a vial containing 5 mg peptide reconstituted with 2 mL water.
Question: What dose in mcg are you administering?
Solution:
- Concentration: 5 mg / 2 mL = 2,500 mcg/mL
- Volume: 15 units = 0.15 mL
- Dose: 0.15 mL x 2,500 mcg/mL = 375 mcg
Problem 7: Choosing the Right Reconstitution Volume
Given: You have a 10 mg peptide vial. Your prescribed dose is 500 mcg. You want each dose to be approximately 10 units for easy measurement.
Question: How much BAC water should you add?
Solution:
- Target: 500 mcg per dose = 10 units = 0.10 mL
- Required concentration: 500 mcg / 0.10 mL = 5,000 mcg/mL = 5 mg/mL
- Water volume: 10 mg / 5 mg/mL = 2 mL
Problem 8: Sermorelin Daily Dosing
Given: 9 mg sermorelin vial, reconstituted with 3 mL BAC water. Protocol calls for 300 mcg daily before bed.
Question: Units per dose? How many days does the vial last? Will you use it all before the 28-day expiration?
Solution:
- Concentration: 9 mg / 3 mL = 3 mg/mL = 3,000 mcg/mL
- Dose volume: 300 mcg / 3,000 mcg/mL = 0.10 mL = 10 units per dose
- Total volume: 3 mL = 300 units; doses per vial: 300 / 10 = 30 doses
- At daily dosing: 30 days of use
- Since the 28-day expiration hits on day 28, you'll have 2 doses remaining that should be discarded. 28 days of actual use from this vial.
Problem 9: NAD+ Larger Volume
Given: 200 mg NAD+ vial, pre-mixed at 100 mg/mL (2 mL total). Protocol calls for 100 mg SubQ, 3x per week.
Question: Volume per dose? Can you use a standard insulin syringe?
Solution:
- Concentration: 100 mg/mL (pre-mixed - no math needed)
- Dose volume: 100 mg / 100 mg/mL = 1.0 mL = 100 units
- A 1.0 mL (100 unit) insulin syringe can handle this dose. It's the full capacity of the syringe, so draw carefully. Alternatively, use a 3 mL syringe with a detachable 25-27G needle.
- Total doses: 2 mL / 1 mL per dose = 2 doses. At 3x/week, this vial lasts less than 1 week.
Problem 10: Epithalon Cycle Planning
Given: 50 mg Epithalon vial. Protocol calls for 10 mg daily SubQ for 10 days (one cycle). You want each dose to be approximately 20 units.
Question: What reconstitution volume? Will the vial cover the full cycle?
Solution:
- Target: 10 mg = 10,000 mcg per dose = 20 units = 0.20 mL
- Required concentration: 10,000 mcg / 0.20 mL = 50,000 mcg/mL = 50 mg/mL
- Water volume: 50 mg / 50 mg/mL = 1 mL of BAC water
- Total volume: 1 mL = 100 units; doses per vial: 100 / 20 = 5 doses
- At daily dosing for a 10-day cycle: you need 10 doses but only get 5 from this reconstitution. You'll need to reconstitute the remaining peptide in a second vial or use a larger vial.
Wait - 50 mg is in a single vial. At 10 mg/day for 10 days, you need exactly 100 mg total. One 50 mg vial only covers 5 days. You'd need two 50 mg vials for one complete cycle. Alternatively, if the vial is large enough, reconstitute with 2 mL to get 25 mg/mL, drawing 40 units (0.4 mL) per dose. The 2 mL would then last 5 days (5 x 0.4 mL = 2 mL), and you'd still need a second vial for days 6-10.
Special Populations and Considerations
Certain groups require modified approaches to peptide reconstitution, dosing, or injection technique. While this guide primarily addresses adult self-administration, the following populations merit specific discussion.
Patients With Needle Anxiety
Needle phobia (trypanophobia) affects an estimated 20-25% of adults and can be a significant barrier to peptide therapy adherence. Several strategies can help:
- Auto-injector devices. Some compounding pharmacies offer peptides in auto-injector pen formats that hide the needle and administer the injection with a button press. The patient never sees the needle, which significantly reduces anxiety for many people.
- Topical numbing agents. Over-the-counter lidocaine cream (e.g., EMLA or LMX) applied 30-60 minutes before injection can eliminate the sensation of needle insertion entirely. Cover the cream with an occlusive dressing (plastic wrap) for best absorption.
- Distraction techniques. Listening to music, watching a video, or focusing on deep breathing during the injection can reduce the perceived pain by shifting attention away from the needle.
- Vibration devices. Products like the Buzzy device and ShotBlocker apply vibration or pressure near the injection site, activating sensory nerve fibers that compete with pain signals (gate control theory). Clinical studies have shown significant pain reduction in both pediatric and adult populations (Baxter et al., 2011).
- Gradual exposure. For severe needle phobia, working with a therapist who specializes in exposure therapy can be transformative. Many patients who initially cannot self-inject become comfortable within a few sessions.
Consider also that intranasal peptide formulations like Selank and Semax, or oral compounds like MK-677, avoid needles entirely. If your therapeutic goals can be met with a non-injectable peptide, that may be the most practical solution for needle-phobic patients.
Patients on Anticoagulant Therapy
Patients taking blood thinners (warfarin, heparin, apixaban, rivaroxaban, etc.) or antiplatelet agents (aspirin, clopidogrel) are at increased risk of injection site bruising and hematoma formation. Modified injection technique for this population:
- Apply firm, steady pressure to the injection site for 60 seconds after needle withdrawal (instead of the usual 5-10 seconds)
- Do not rub the injection site
- Use the smallest gauge needle available (31G) to minimize tissue trauma
- Consider applying an ice pack briefly before injection to vasoconstrict local blood vessels
- Monitor for excessive bruising or hematoma formation and report to your prescriber if it occurs frequently
Patients With Limited Dexterity
Conditions like arthritis, neuropathy, tremor, or post-surgical limitations can make syringe manipulation difficult. Adaptations include:
- Syringe magnifiers. Clip-on magnifying lenses that attach to the syringe barrel make graduation marks easier to read for patients with vision impairment.
- Pen injector devices. Dial-a-dose pen injectors are easier to manipulate than traditional syringes, with audible click feedback for each dose increment.
- Caregiver assistance. Having a family member, partner, or visiting nurse administer the injection may be the safest option when dexterity limitations are severe.
- Pre-filled syringes. Ask your compounding pharmacy about pre-filled, single-dose syringes that eliminate the need to draw from a vial.
Body Composition Considerations
Subcutaneous tissue thickness varies significantly between individuals and between injection sites on the same individual. This affects needle length selection and injection angle:
- Lean individuals (low body fat): May have very thin subcutaneous tissue, especially in the abdomen and thighs. A standard 12.7 mm (1/2-inch) insulin needle at a 90-degree angle may penetrate through the subcutaneous layer and into muscle. Use a 45-degree angle or switch to a shorter 8 mm needle.
- Individuals with higher body fat: Have thicker subcutaneous tissue, which means a 90-degree angle with a 12.7 mm needle is appropriate and comfortable. The thicker tissue also provides more area for site rotation.
- Site-specific variation: The abdomen typically has thicker subcutaneous tissue than the thighs or arms. If you're lean and using the thigh, a shallower angle may be needed even if the abdomen works fine at 90 degrees.
Pediatric Considerations
Peptide therapy in pediatric patients requires prescriber supervision and is beyond the scope of this self-administration guide. However, two important notes relevant to reconstitution:
- Benzyl alcohol is contraindicated in neonates (newborns) due to the risk of "gasping syndrome" from cumulative benzyl alcohol toxicity (Gershanik et al., 1982). Sterile water for injection must be used instead of bacteriostatic water for any neonatal preparation.
- Pediatric doses are typically weight-based (mcg per kilogram of body weight) rather than fixed doses. The dosing math is the same, but an additional step is required: multiply the per-kg dose by the patient's weight to get the actual dose before calculating volume and syringe units.
Regulatory and Sourcing Landscape
Understanding where peptides come from, how they're regulated, and what to look for in a quality product protects your health and ensures you're getting what you pay for.
FDA Status of Peptides
The regulatory landscape for peptides in the United States is nuanced. Some peptides have full FDA approval as finished pharmaceutical products (e.g., brand-name semaglutide as Ozempic/Wegovy). Others are available through compounding pharmacies under the Federal Food, Drug, and Cosmetic Act's compounding provisions (sections 503A and 503B).
Compounded peptides are not FDA-approved products, but the compounding process is regulated by the FDA and state boards of pharmacy. 503B outsourcing facilities operate under FDA oversight with Current Good Manufacturing Practice (cGMP) requirements, while 503A pharmacies operate under state pharmacy board regulation with patient-specific prescription requirements.
The key distinction for patients: compounded peptides should only be obtained with a valid prescription from a licensed healthcare provider, through a licensed compounding pharmacy. The prescription establishes the medical necessity, the pharmacist compounds the product according to USP standards, and the patient receives a product with proper labeling, lot tracking, and quality testing.
Quality Indicators to Look For
When evaluating a peptide source, whether it's a compounding pharmacy recommended by your prescriber or a research peptide supplier for laboratory use, these quality indicators matter:
- Certificate of Analysis (COA). Every peptide batch should come with a COA that includes HPLC purity data, mass spectrometry confirmation (showing the correct molecular weight), amino acid analysis, and endotoxin testing results. A reputable supplier will provide the COA for your specific batch, not a generic template.
- Purity specification. Clinical-grade peptides should be at least 95% pure by HPLC. Research-grade peptides vary, but reputable suppliers target 98%+ for most compounds. Anything below 90% is a red flag.
- Sterility testing. Injectable peptides must be sterile. Compounding pharmacies are required to perform sterility testing on their preparations. The COA should indicate that the product passed sterility testing per USP Chapter 71.
- Endotoxin testing. Bacterial endotoxins can cause fever, chills, and serious systemic reactions when injected. The Limulus Amebocyte Lysate (LAL) test detects endotoxin contamination, and results should be below the USP limit (typically less than 5 EU/kg body weight).
- Proper packaging. Lyophilized peptides should be in sealed glass vials with rubber stoppers and aluminum crimp caps. The vial should be labeled with the peptide name, quantity, lot number, expiration date, and storage instructions. Amber (light-protective) vials are a bonus for photosensitive peptides.
What to Avoid
Red flags that should make you question a peptide source:
- No COA available, or COA appears to be from a different batch or generic template
- Peptide sold without requiring a prescription (for human-use products)
- Unrealistically low prices - quality peptide synthesis, purification, lyophilization, sterility testing, and packaging have real costs that are reflected in price
- Vials with poor labeling, handwritten labels, or missing lot numbers
- Products marketed with therapeutic claims for specific diseases (this violates FDA regulations for non-approved products)
- Suppliers who cannot provide third-party analytical testing upon request
For a trusted starting point, the FormBlends Free Assessment connects you with providers who source from licensed compounding pharmacies with appropriate quality controls.
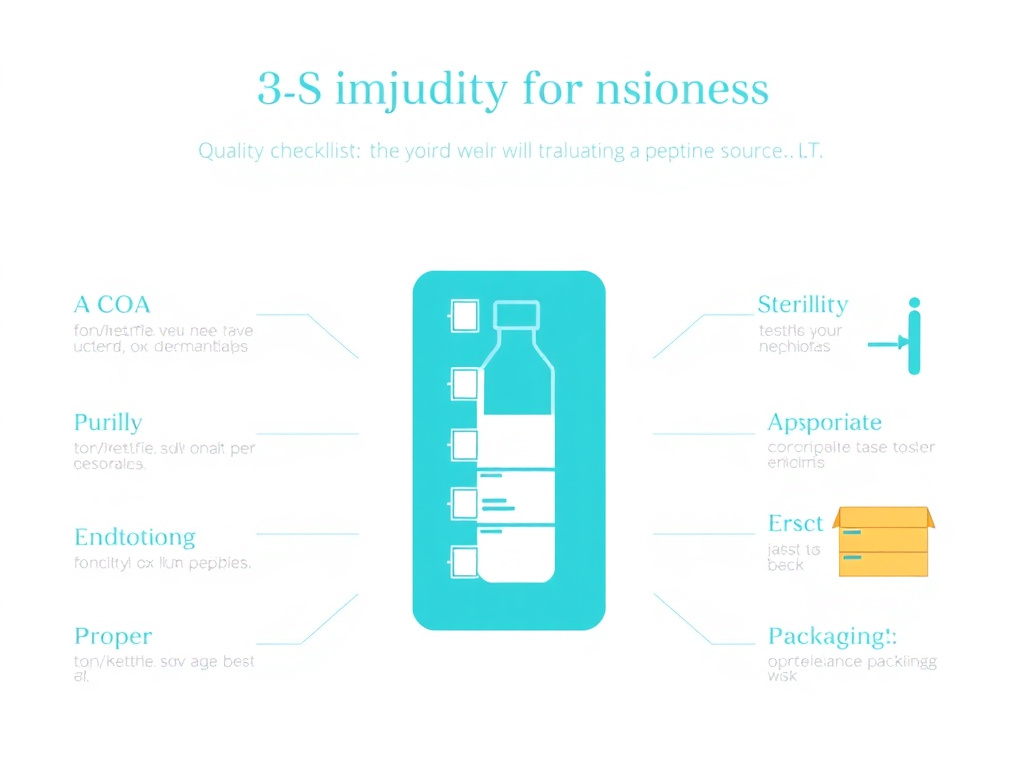
Reconstitution Checklist Summary
Before you reconstitute your first vial (or your hundredth), run through this comprehensive checklist. Print it out and keep it near your workspace for quick reference.
Pre-Reconstitution Checklist
| Check | Item | Notes |
|---|---|---|
| ☐ | Peptide vial at room temperature | Remove from freezer/fridge 15-20 min prior |
| ☐ | BAC water vial at room temperature | Should be room temp for best dissolution |
| ☐ | Dosing math completed | Know your concentration, dose volume, and units before starting |
| ☐ | Clean workspace prepared | Wiped with 70% isopropyl alcohol |
| ☐ | Hands washed | Soap and water, or alcohol-based sanitizer |
| ☐ | Supplies gathered | Reconstitution syringe (18-22G), insulin syringe (29-31G), alcohol swabs, sharps container, label/marker |
| ☐ | Vial inspected | Check label for correct peptide, amount, lot, expiry; inspect cake for unusual color or collapse |
During Reconstitution Checklist
| Check | Item | Notes |
|---|---|---|
| ☐ | Both stoppers alcohol-swabbed | Wipe in one direction, let dry 30 seconds |
| ☐ | Air injected into BAC water vial | Equal to volume you'll withdraw |
| ☐ | Correct volume of BAC water drawn | Double-check against your dosing math |
| ☐ | Air bubbles removed from syringe | Tap barrel, expel bubbles |
| ☐ | Water added slowly down vial wall | 30-60 seconds for typical volume |
| ☐ | Vial swirled gently, NOT shaken | Roll between palms or rotate wrist |
| ☐ | Complete dissolution achieved | No visible particles or undissolved powder |
| ☐ | Solution inspected for clarity | Clear, colorless to pale yellow, no cloudiness |
Post-Reconstitution Checklist
| Check | Item | Notes |
|---|---|---|
| ☐ | Vial labeled with peptide name | Include amount (mg) |
| ☐ | Concentration written on label | e.g., "2,500 mcg/mL" |
| ☐ | Reconstitution date recorded | Today's date |
| ☐ | Discard-by date recorded | 28 days from today |
| ☐ | Vial stored upright in refrigerator | 2-8 degrees C, middle shelf, away from back wall |
| ☐ | Reconstitution syringe disposed | Into sharps container |
| ☐ | Calendar reminder set | For discard-by date |
Pre-Injection Checklist
| Check | Item | Notes |
|---|---|---|
| ☐ | Vial warmed to room temperature | 15-30 minutes out of fridge |
| ☐ | Vial within 28-day use window | Check discard-by date |
| ☐ | Solution still clear and particle-free | Inspect before each use |
| ☐ | Stopper alcohol-swabbed | Every time, even if just used it an hour ago |
| ☐ | Fresh insulin syringe used | Never reuse syringes |
| ☐ | Correct dose drawn (double-checked) | Verify units match your calculated dose |
| ☐ | Air bubbles expelled | Tap and push to needle tip |
| ☐ | Injection site cleaned with alcohol | Circular motion, let dry |
| ☐ | Injection site rotated from last use | At least 1 inch from previous site |
| ☐ | Injected slowly (5-10 seconds) | Slow = less pain and better absorption |
| ☐ | Counted to 5-10 before withdrawing | Prevents leakback |
| ☐ | Syringe disposed in sharps container | Do not recap used needles |
| ☐ | Vial returned to refrigerator | Immediately after drawing dose |
For additional resources, tools, and compound-specific guidance, visit the FormBlends Peptide Hub or use the Dosing Calculator for automated dose calculations.
Pharmacokinetics of Subcutaneous Peptide Absorption
Understanding how peptides move from the injection site into the bloodstream helps explain why injection technique, site selection, and injection volume all matter. Here's the science of subcutaneous absorption in practical terms.
What Happens After You Inject
When you inject a peptide solution subcutaneously, you create a small depot of liquid in the subcutaneous tissue - the fatty layer between the skin (dermis) and the muscle below. This depot doesn't enter the bloodstream all at once. Instead, the peptide molecules must travel through the extracellular matrix of the subcutaneous tissue, enter the capillary network or lymphatic vessels, and then reach systemic circulation.
The process happens through two primary pathways:
Capillary absorption. Small peptide molecules (molecular weight below approximately 16,000 Daltons) primarily enter the blood through the capillary walls in the subcutaneous tissue. The capillaries have small fenestrations (gaps) that allow molecules of this size to pass through relatively easily. Most therapeutic peptides fall in the 1,000-5,000 Dalton range, which means capillary absorption is their primary route to the bloodstream (Richter et al., 2012). The rate of capillary absorption depends on local blood flow, which varies by injection site and individual physiology.
Lymphatic absorption. Larger molecules (above approximately 16,000 Daltons) are too big to pass through capillary fenestrations efficiently. Instead, they enter the lymphatic system, which has larger, more permeable vessels. Lymphatic absorption is slower than capillary absorption - lymph flow is driven by skeletal muscle contractions and body movement rather than by the heart's pumping action. For most small peptides used in therapeutic protocols, lymphatic absorption plays a minor role (Porter & Charman, 2000).
Factors That Affect Absorption Rate
Several factors influence how quickly and completely a subcutaneously injected peptide reaches systemic circulation:
1. Injection Site Blood Flow
The abdomen has the highest capillary density of the common subcutaneous injection sites, followed by the arm, thigh, and buttock. Higher blood flow means faster absorption. Research on insulin pharmacokinetics has shown that abdominal injections reach peak concentration 50% faster than thigh injections in some studies (Beshyah et al., 1991). While the magnitude of this difference varies between peptides, the general pattern holds: abdomen is fastest, followed by arm, then thigh.
This site-dependent variability is why most peptide protocols recommend the abdomen as the default injection site and encourage consistency - if you start with abdominal injections, stick with abdominal injections rather than randomly alternating between abdomen and thigh, which would introduce absorption variability.
2. Injection Volume
Larger injection volumes create larger subcutaneous depots that take longer to absorb. The larger surface area of a big depot partially compensates for this, but the net effect is still slower absorption for larger volumes. This is one practical reason to prefer higher concentration (less water) reconstitutions when feasible - smaller injection volumes generally produce more consistent and slightly faster absorption (Zheng et al., 2021).
However, there's a lower limit: very small injection volumes (under 0.05 mL or 5 units) may partially remain in the needle dead space or leak back through the needle track, reducing the actual delivered dose. The practical sweet spot is 0.1-0.3 mL (10-30 units) for most peptide injections.
3. Injection Depth
Injecting too deep (into muscle) changes the absorption profile entirely - intramuscular tissue has much higher blood flow than subcutaneous tissue, leading to faster absorption and higher peak concentrations. Injecting too shallow (intradermally, into the skin itself) also changes the profile - intradermal injections create a visible bleb (raised bump) and have a different absorption rate and pattern.
The goal is consistent subcutaneous placement. Using the correct needle length (typically 12.7 mm / 0.5 inch for most patients), proper pinch technique, and the appropriate insertion angle (45-90 degrees based on body composition) ensures consistent depth with each injection.
4. Local Temperature
Warm tissue has higher blood flow than cold tissue. This is why cold peptide solution injected into cool skin (e.g., in a cold room or right out of the shower) absorbs more slowly and may produce a longer-lasting depot. Conversely, exercising immediately after injection increases blood flow to the injection site and can accelerate absorption. Neither extreme is desirable for consistent pharmacokinetics - aim for a normal resting state when injecting (Rini et al., 2016).
5. Exercise and Physical Activity
Physical activity increases blood flow to exercising muscles and surrounding tissues, which can accelerate absorption of subcutaneously injected peptides. For most peptides, this acceleration is clinically insignificant. However, for compounds with narrow therapeutic windows or dose-dependent side effects (like GLP-1 agonists that can cause nausea), exercising vigorously immediately after injection could theoretically increase peak concentrations and side effects.
General guidance: don't change your exercise routine because of peptide injections, but consider injecting at a time when your activity level is consistent from day to day (e.g., every evening before bed) rather than sometimes before exercise and sometimes at rest.
6. Subcutaneous Tissue Composition
The extracellular matrix of subcutaneous tissue varies between individuals and between body sites. Higher proportions of fibrous connective tissue slow absorption compared to loose, fatty tissue. Areas with lipohypertrophy (from repeated injection trauma) have altered tissue composition that can unpredictably slow, accelerate, or otherwise distort absorption - another reason why site rotation is essential (Famulla et al., 2016).
Bioavailability Considerations
Bioavailability is the fraction of an administered dose that reaches systemic circulation in active form. For subcutaneously injected peptides, bioavailability is generally high (50-100%) but never exactly 100%. Several processes reduce bioavailability:
- Pre-systemic degradation. Enzymes in the subcutaneous tissue can cleave peptide bonds before the molecule reaches the bloodstream. The extent of degradation depends on the specific peptide sequence and the enzymatic environment at the injection site.
- Local catabolism. Macrophages and other immune cells in the subcutaneous tissue can engulf and degrade foreign molecules, reducing the fraction that reaches circulation.
- Incomplete absorption. A small fraction of the injected dose may remain permanently trapped in the subcutaneous tissue, bound to extracellular matrix components, or encapsulated by inflammatory responses.
For practical purposes, the bioavailability of most subcutaneously injected peptides is high enough that the labeled dose can be considered the effective dose. Prescribers account for any bioavailability losses when establishing dose protocols. You don't need to adjust your dose calculations to compensate for absorption losses.
Time to Peak and Duration of Action
Different peptides have very different pharmacokinetic profiles after subcutaneous injection. Here's a general overview for common categories:
| Peptide Category | Time to Peak (Tmax) | Half-Life | Injection Frequency |
|---|---|---|---|
| BPC-157 | 1-2 hours | ~4 hours (estimated) | 1-2x daily |
| TB-500 | 2-4 hours | ~6-8 hours | 2-3x weekly |
| GH secretagogues (CJC/Ipamorelin) | 0.5-2 hours | CJC: 8 days (with DAC), 30 min (no DAC); Ipamorelin: ~2 hours | Daily (no DAC) or weekly (DAC) |
| Semaglutide | 1-3 days | ~7 days | Once weekly |
| Tirzepatide | 8-72 hours | ~5 days | Once weekly |
| Sermorelin | 0.5-1 hour | ~10-20 minutes | Daily |
| Epithalon | 1-2 hours | ~2-4 hours | Daily (during cycle) |
Notice the enormous range - from sermorelin's 10-20 minute half-life (requiring daily injection to maintain any sustained effect) to semaglutide's 7-day half-life (enabling weekly dosing). These differences are built into the peptide's molecular design. Semaglutide, for instance, has a fatty acid side chain that binds to albumin in the blood, dramatically slowing its clearance. CJC-1295 with DAC (Drug Affinity Complex) has a similar albumin-binding modification that extends its half-life from 30 minutes to approximately 8 days.
The practical takeaway: don't assume that all peptides follow the same dosing schedule. A peptide with a short half-life needs more frequent dosing, while one with a long half-life can be dosed weekly or even less often. Your prescriber's dosing schedule is designed to match the specific pharmacokinetic profile of your compound.
Troubleshooting Advanced Scenarios
Beyond the common mistakes covered earlier, here are more nuanced problems that can arise during peptide reconstitution and administration, along with their solutions.
Stopper Coring
Stopper coring occurs when small pieces of the rubber stopper break off and fall into the peptide solution during needle insertion. These rubber fragments appear as small, dark, floating particles in the solution. Coring is more likely when using large-gauge needles (18-20G) for reconstitution, when inserting the needle straight down through the center of the stopper, or when the stopper has been punctured many times.
Prevention: Insert the reconstitution needle at a slight angle (approximately 45-60 degrees from vertical) with the bevel (slanted opening) facing up. This allows the needle tip to push through the rubber rather than cutting a plug. Once the tip is through, straighten the needle to vertical. For dose-drawing with insulin needles, the very fine gauge (29-31G) makes coring extremely unlikely.
If coring occurs: You can filter the solution by drawing it through a 0.2 micron syringe filter into a new sterile vial. However, if you don't have a sterile filter available, visually inspect the solution before each draw and avoid drawing from near the floating particles. The rubber itself is inert and non-toxic, but you don't want to inject a rubber fragment. If coring is severe (multiple large fragments), reconstitute a new vial.
Vacuum Loss in the Peptide Vial
Some lyophilized peptide vials are packaged under partial vacuum or inert gas (nitrogen or argon) to protect the peptide from oxidation during storage. When you insert the reconstitution needle, you may notice a slight "pull" as the plunger is drawn inward by the vacuum. This is normal.
However, if you don't feel any vacuum when inserting the needle into a new, unopened vial, it may indicate a compromised seal - the stopper may have leaked, allowing air (and potentially moisture and microorganisms) into the vial during storage. While this doesn't necessarily mean the peptide is degraded, it's a risk factor. Inspect the cake for signs of moisture absorption (sticky, glassy appearance instead of dry, fluffy cake) or discoloration. If anything looks off, contact your supplier.
Peptide Won't Dissolve
If your lyophilized peptide doesn't dissolve after 5-10 minutes of gentle swirling at room temperature, consider these possibilities:
- The vial is still cold. Allow more time at room temperature (up to 30 minutes) and try again.
- Wrong solvent. Some peptides require acidic reconstitution media. Check the manufacturer's instructions - if the peptide needs acetic acid for solubilization, bacteriostatic water alone won't work.
- Degraded peptide. Peptides that have been exposed to heat, moisture, or prolonged storage beyond their expiration date may form insoluble aggregates. If the cake looks melted, discolored, or has a glassy appearance, it may be degraded beyond recovery.
- Very hydrophobic peptide. Some sequences have significant hydrophobic character and resist dissolution in pure water. Try adding a very small amount of acetic acid (0.1%) to the reconstitution water, or consult the peptide's solubility data. This is rare for standard therapeutic peptides but can occur with research-grade compounds.
If none of these solutions work, the peptide is likely compromised. Contact your supplier for a replacement rather than attempting to use a partially dissolved preparation.
Pressure Buildup in the Vial
As you inject bacteriostatic water into the peptide vial, the pressure inside increases because you're adding liquid to a sealed container. This pressure can push the plunger back or cause the water to spray back out around the needle when you withdraw it. To manage this:
- Inject air first. Before drawing BAC water, you injected air into the BAC water vial (to equalize pressure for easy drawing). Do NOT inject air into the peptide vial before adding water - this creates excessive positive pressure.
- Add water slowly. Slow injection gives the air in the vial time to compress and equalize through the stopper's natural gas permeability.
- Release pressure periodically. If you feel significant resistance on the plunger, pause, pull back slightly to relieve pressure, then continue adding water. Alternatively, briefly remove the needle to let trapped air escape, re-swab the stopper, and continue.
- After adding all water, you can equalize pressure by drawing a small amount of air into the syringe before withdrawing the needle. This pulls the excess air out of the vial, reducing the chance of solution spraying out when the needle is removed.
Accidentally Injecting Air
A common fear among new injectors is accidentally injecting air subcutaneously. While intravenous air embolism is a real medical concern, subcutaneous air injection is essentially harmless. A few units of air injected into the subcutaneous tissue will simply be absorbed by the surrounding tissues over minutes to hours. You may notice a slightly larger lump at the injection site, but there is no risk of air embolism from a subcutaneous injection.
That said, injecting air means you've delivered less peptide than intended (the air displaced solution in the syringe). The dose error matters more than the air itself. Always expel air bubbles before injecting to ensure accurate dosing.
Leakback After Injection
Leakback (also called "tracking" or "wet injection") occurs when a small amount of injected solution leaks back out through the needle track after you withdraw the needle. It appears as a small drop of liquid at the injection site. This is more common with:
- Larger injection volumes (more tissue distension, more pressure to push liquid out)
- Shallow injection angles (longer needle track through the skin)
- Quick needle withdrawal (before the tissue has time to seal around the track)
Prevention: Count to 5-10 after the plunger is fully depressed before withdrawing the needle. This gives the liquid time to disperse into the tissue and reduces back-pressure. Withdraw the needle slowly and at the same angle it entered. Apply gentle pressure (not rubbing) with a cotton ball or gauze immediately after withdrawal.
If leakback occurs, don't attempt to re-inject the lost volume. The amount lost is typically minimal (less than 0.01 mL), and over-correcting by drawing additional solution introduces dosing variability worse than the small loss.
Drawing From Nearly Empty Vials
As you approach the end of a vial, drawing the final doses becomes progressively more difficult. The remaining liquid pools in the concave bottom of the glass vial, and the needle tip may struggle to reach it. Techniques for maximizing extraction:
- Tilt the vial at a steep angle so the liquid pools in one corner
- Insert the needle bevel-down (toward the glass bottom) to get as close to the vial floor as possible
- Inject 5-10 units of air into the vial first to create positive pressure that pushes liquid toward the needle
- Accept that the final 0.05-0.1 mL is dead volume that cannot be practically extracted. This is a normal cost of using multi-dose vials.
Building a Peptide Workspace
Having a dedicated, organized workspace for peptide reconstitution and injection makes the process faster, cleaner, and safer. Here's how to set up a home peptide station that supports proper technique.
Location Requirements
Choose a location that is:
- Clean and dry. Avoid bathrooms (high humidity promotes microbial growth and can affect peptide stability). A bedroom nightstand, kitchen counter, or home office desk all work well.
- Well-lit. You need to read syringe markings accurately and inspect solutions for clarity and particles. Natural light or a bright desk lamp is ideal.
- Flat and stable. A level surface prevents vials from rolling and provides a stable platform for filling syringes.
- Private. If you have children or pets, choose a location where you can work without interruption or risk of accidental needle exposure.
- Near refrigerator access. Minimizing the time your reconstituted vials spend at room temperature means keeping them close to the fridge.
Organizing Your Supplies
A small organizer box or drawer with compartments works well for keeping everything together and accessible. Suggested organization:
- Compartment 1: Sealed insulin syringes (injection syringes)
- Compartment 2: Reconstitution syringes and needles (18-22G)
- Compartment 3: Alcohol swabs (individually wrapped)
- Compartment 4: Bandages, cotton balls, or gauze
- Compartment 5: Labels, marker, dosing reference card
Keep a sharps container nearby but out of reach of children. Wall-mounted sharps containers are available and keep the counter clear while maintaining easy access.
Refrigerator Organization
If you're using multiple peptides simultaneously, keeping them organized in the refrigerator prevents confusion and dosing errors. Consider:
- A small, clear container or bag for each peptide, labeled with the peptide name
- Vials stored upright to keep the stopper above the liquid level
- A separate bag or section for bacteriostatic water vials
- A small whiteboard or sticky note on the fridge with each peptide's reconstitution date and discard-by date
Record Keeping
Maintaining a simple log helps you track your peptide use, identify patterns, and troubleshoot problems. A basic log might include:
| Date | Peptide | Dose (mcg) | Units | Site | Notes |
|---|---|---|---|---|---|
| 3/1 | BPC-157 | 250 | 10 | L abdomen | No issues |
| 3/1 | Semaglutide | 500 | 20 | R thigh | Mild sting, let warm longer next time |
| 3/2 | BPC-157 | 250 | 10 | R abdomen | Small bruise |
This log doesn't need to be fancy - a simple notebook, spreadsheet, or notes app on your phone works fine. The value comes from being able to look back and see patterns: do you consistently bruise at one site? Did side effects correlate with a dosing change? When was the last time you reconstituted a specific vial?
For digital tracking tools and more structured approaches to peptide therapy management, explore the resources at FormBlends Science.
Disposal and Environmental Responsibility
Proper disposal of peptide-related waste is both a safety requirement and an environmental responsibility:
- Used syringes and needles: Always place in a rigid, puncture-resistant sharps container. When full, seal and dispose through your local household hazardous waste program, pharmacy take-back, or mail-back service (available from companies like Stericycle and MedWaste). Never place loose sharps in household trash or recycling.
- Empty peptide vials: Glass vials with residual peptide solution should be treated as pharmaceutical waste. Many pharmacies accept empty vials for proper disposal. If no take-back is available, wrap the glass vial in tape or place in a sealed container before discarding in household trash to prevent breakage.
- Expired or discarded solutions: Do not pour reconstituted peptide solutions down the drain. The environmental impact is likely minimal at individual-use volumes, but proper pharmaceutical disposal is preferred. The FDA's flush list and drug take-back programs provide guidance on disposing of unused medications.
- Packaging and supplies: Non-contaminated packaging (boxes, insert papers, alcohol swab wrappers) can be recycled or discarded normally.
Reconstitution Science: Solubility and pH
Most peptide users never need to think about solubility or pH - bacteriostatic water works for the vast majority of compounds. But understanding these principles helps you troubleshoot problems and make informed decisions when things don't go as expected.
Why Most Peptides Dissolve Easily in Water
Peptides are chains of amino acids linked by peptide bonds. Each amino acid has a side chain with specific chemical properties - some are hydrophilic (water-loving) and some are hydrophobic (water-repelling). The overall solubility of a peptide in water depends on the balance of hydrophilic and hydrophobic amino acids in its sequence, as well as the pH of the solution and the presence of any salts or buffering agents.
Most therapeutic peptides are designed or selected for good aqueous solubility. Peptides with a high proportion of charged amino acids (arginine, lysine, aspartate, glutamate) or polar amino acids (serine, threonine, asparagine, glutamine) tend to dissolve readily in water. Peptides with many hydrophobic amino acids (leucine, isoleucine, valine, phenylalanine, tryptophan) may require modified solvents.
BPC-157, for example, is a 15-amino-acid peptide with a mix of charged and polar residues that makes it highly water-soluble. It dissolves in bacteriostatic water within seconds of gentle swirling. Semaglutide, while larger (31 amino acids) and modified with a fatty acid side chain, is still formulated to dissolve in standard aqueous reconstitution media.
The Role of pH
The pH of the reconstitution solvent affects peptide solubility through its effect on amino acid ionization. At different pH values, the charged amino acid side chains exist in different protonation states, which changes the peptide's overall charge and, consequently, its interaction with water molecules.
Bacteriostatic water has a pH of approximately 4.5-7.0, which falls in the range where most therapeutic peptides are soluble. Some peptides have an isoelectric point (pI) - the pH at which the molecule carries no net charge - that falls within this range. At the pI, peptides tend to have minimum solubility because the lack of net charge reduces electrostatic interactions with water. If a peptide's pI happens to coincide with the pH of your reconstitution water, you might observe slower dissolution or slight turbidity.
In practice, this is rarely a problem with bacteriostatic water and standard therapeutic peptides. However, if you encounter a peptide that won't dissolve in BAC water, pH mismatch is one possible explanation. The solution is to use a reconstitution solvent with a different pH - typically 0.1% acetic acid (pH ~3) for basic peptides or a dilute bicarbonate buffer (pH ~8) for acidic peptides. Always follow the manufacturer's solubility recommendations.
Concentration Limits
Every peptide has a maximum concentration above which it won't remain in solution. This saturation concentration depends on the peptide's intrinsic solubility, the solvent composition, temperature, and pH. For most therapeutic peptides at standard reconstitution concentrations (1-10 mg/mL), saturation is not a concern - you're well below the limit.
However, when working with large peptide amounts in small vial volumes (e.g., reconstituting 50 mg in 1 mL to achieve a 50 mg/mL concentration), you may approach or exceed the solubility limit for certain compounds. Signs of exceeding the concentration limit include:
- Persistent cloudiness even with prolonged swirling
- Visible crystals or precipitate at the bottom of the vial
- Clear solution that becomes cloudy when refrigerated (temperature-dependent solubility)
If you suspect you've exceeded the solubility limit, add more bacteriostatic water to reduce the concentration. This means recalculating your dose volumes, but it's far better than injecting a solution with undissolved peptide particles.
Excipient Effects on Solubility
As discussed in the lyophilization section, many peptide formulations include excipients like mannitol, trehalose, or buffer salts. These excipients can affect the reconstitution experience:
- Mannitol is highly water-soluble and dissolves quickly, often faster than the peptide itself. You may see the cake dissolve unevenly, with the mannitol-rich portions dissolving first and the peptide-rich portions taking longer.
- Buffer salts (sodium phosphate, histidine) dissolve almost instantly and adjust the pH of the reconstituted solution to the optimal range for the peptide. If your reconstitution water has a very different pH from the buffer target, you may notice a brief period of turbidity as the pH equilibrates.
- Surfactants (polysorbate 20 or 80) are sometimes added at very low concentrations to prevent peptide adsorption to the glass vial and to improve reconstitution behavior. You may notice slightly more foaming during reconstitution with surfactant-containing formulations - this is normal and the foam will dissipate.
Temperature and Dissolution Rate
Warm water dissolves most solutes faster than cold water - this is a basic chemistry principle that applies to peptide reconstitution. The increased molecular kinetic energy at higher temperatures promotes faster diffusion and more rapid disruption of the solid cake structure. This is why allowing both the vial and the bacteriostatic water to reach room temperature before reconstitution is important for smooth, complete dissolution.
Do not, however, use warm or hot water for reconstitution. Temperatures above 35-40 degrees Celsius can promote peptide degradation, even during the brief reconstitution process. Room temperature (20-25 degrees C) is the ideal balance between dissolution speed and peptide stability. If you're reconstituting in a particularly cold room (below 18 degrees C), consider warming the vials slightly by holding them in your hands for a few minutes before starting.
Understanding Peptide Degradation Pathways
Knowing how and why peptides break down after reconstitution helps you make better storage decisions and recognize when a peptide is no longer suitable for use.
Chemical Degradation
Chemical degradation involves covalent changes to the peptide's molecular structure. The primary chemical degradation pathways for reconstituted peptides include:
Deamidation. Asparagine (Asn) and glutamine (Gln) residues spontaneously lose their amide groups in aqueous solution, converting to aspartate and glutamate, respectively. This reaction is accelerated by higher pH, higher temperature, and certain neighboring amino acids in the sequence. Deamidation changes the peptide's charge, which can alter its biological activity and receptor binding affinity. The rate is sequence-dependent, but most asparagine residues show measurable deamidation within weeks at neutral pH and refrigerated temperature (Stephenson & Clarke, 1989).
Oxidation. Methionine, cysteine, tryptophan, and histidine residues are susceptible to oxidation by dissolved oxygen, peroxides, or light-generated reactive oxygen species. Methionine oxidation to methionine sulfoxide is the most common and can significantly reduce biological activity (Li et al., 1995). Protecting reconstituted peptides from light and storing in tightly sealed vials minimizes oxygen exposure and reduces oxidative degradation.
Hydrolysis. Water molecules directly attack peptide bonds, cleaving the chain. While the rate of peptide bond hydrolysis is generally slow at neutral pH and refrigerated temperature, certain sequences are more susceptible, particularly those containing aspartate-proline (Asp-Pro) bonds, which are known hydrolysis hot spots. Over 28 days at 2-8 degrees C, hydrolysis typically contributes minimally to overall degradation for most therapeutic peptides (Manning et al., 2010).
Disulfide scrambling. Peptides containing cysteine residues may have disulfide bonds that are critical to their three-dimensional structure and biological activity. In solution, these disulfide bonds can undergo exchange reactions (scrambling), leading to misfolded or inactive variants. Peptides with multiple cysteine residues (like some growth factors and hormones) are particularly vulnerable (Wang, 1999).
Physical Degradation
Physical degradation involves changes to the peptide's three-dimensional structure or intermolecular associations without breaking covalent bonds:
Aggregation. Peptide molecules can stick together, forming dimers, oligomers, and eventually larger aggregates or fibrils. Aggregation is promoted by shaking, freeze-thaw cycles, exposure to air-liquid interfaces, and high concentrations. Aggregated peptides have reduced biological activity and may trigger immune responses if injected (Jiskoot et al., 2012). Visual signs of aggregation include cloudiness, opalescence, or visible particulates in the solution.
Adsorption. Peptides can adsorb (stick) to the inner surfaces of glass vials, rubber stoppers, and plastic syringe barrels. This reduces the effective concentration of the solution over time, particularly for dilute preparations where the surface-to-volume ratio is high. Adsorption is usually reversible - gently swirling the vial before drawing a dose can re-suspend adsorbed peptide. Some formulations include low concentrations of surfactant (polysorbate 20 or 80) to prevent adsorption (Shire et al., 2004).
Denaturation. Loss of the peptide's native three-dimensional conformation, typically caused by thermal stress, pH extremes, or mechanical agitation. For smaller peptides (under 20 amino acids), denaturation is less of a concern because they have limited secondary structure. Larger peptides and proteins with defined alpha-helical or beta-sheet structures are more susceptible. Denatured peptides may still be soluble (clear solution) but have reduced or absent biological activity - you can't detect denaturation by visual inspection alone.
Practical Implications for Storage
Understanding these degradation pathways reinforces why the storage guidelines exist:
- Refrigeration (2-8 degrees C) slows all chemical and physical degradation reactions roughly 2-4 fold compared to room temperature, based on Arrhenius kinetics.
- Light protection prevents photolytic oxidation and photocatalyzed degradation of sensitive amino acid residues.
- Minimizing air exposure (by keeping the vial sealed and drawing air out after accessing) reduces dissolved oxygen available for oxidation reactions.
- Gentle handling (no shaking, no vortexing) prevents surface-induced aggregation and denaturation at air-liquid interfaces.
- The 28-day limit provides a conservative margin against cumulative chemical degradation and the gradual loss of benzyl alcohol preservative efficacy.
None of this should make you anxious about peptide handling. Standard practices - refrigerate, protect from light, handle gently, use within 28 days - are sufficient to maintain peptide quality for normal use. The science behind these practices simply explains why they work and why shortcuts (like storing at room temperature or using a vial for months) carry real consequences for peptide potency and safety.
For comprehensive information on specific peptides, their mechanisms, and the evidence supporting their therapeutic applications, visit the FormBlends Science section and the Peptide Hub for compound-specific research summaries.