Key Takeaway
Giving yourself a subcutaneous injection for your prescribed peptide is easier than most people expect. This subcutaneous injection technique peptide resource covers the important information you need to make informed decisions.
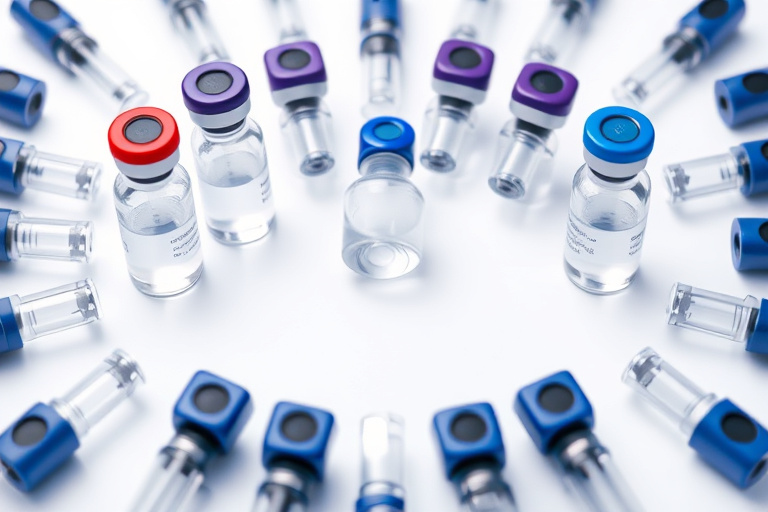
Giving yourself a subcutaneous injection for your prescribed peptide is easier than most people expect. This subcutaneous injection technique peptide resource covers the important information you need to make informed decisions. The needle is tiny, the injection is shallow, and the whole process takes about 30 seconds once you're comfortable. This guide walks you through the complete subcutaneous injection technique) from choosing your injection site to proper aftercare. Whether this is your first self-injection or your fiftieth, these steps ensure you do it safely and comfortably every time.
Key Takeaways: - Choosing Your Injection Site - Step-by-Step Injection Process - Managing Pain and Discomfort - Common Mistakes to Avoid
Choosing Your Injection Site
Subcutaneous (SubQ) injections go into the layer of fat just beneath your skin. This layer absorbs the peptide slowly and steadily, which is exactly what most protocols require.
The best SubQ injection sites are areas with a decent fat pad and easy access:
Abdomen: The most popular site. Inject at least 2 inches away from your belly button. Avoid any area with scars, stretch marks, or bruises. The abdomen offers consistent absorption and is easy to reach.
Outer thigh: The front or outer side of your thigh, about halfway between your hip and knee. Avoid the inner thigh and the area directly above your kneecap.
Back of the upper arm: The fleshy area on the back of your arm between your shoulder and elbow. This site works well but can be harder to reach without help.
Rotate your sites. Don't inject in the same exact spot every time. Repeated injections in one location can cause lumps, scar tissue, or fat changes under the skin. Rotate between different areas (left abdomen, right abdomen, left thigh, right thigh) on a regular schedule.
"We now have cardiovascular outcomes data showing semaglutide reduces MACE events by 20% in people with obesity, independent of diabetes status. The SELECT trial[1] changed how we think about these medications.", Dr. A. Michael Lincoff, MD, Cleveland Clinic, lead author of SELECT
The includes an injection site tracker that reminds you where to inject next so you maintain proper rotation.
Step-by-Step Injection Process
Follow these steps every time you inject. Consistency builds confidence and reduces the chance of errors.
View data table
| Category | Clinical Interest Score | Detail |
|---|---|---|
| BPC-157 | 88 | Tissue repair and gut healing |
| TB-500 | 82 | Injury recovery |
| Sermorelin | 78 | Growth hormone support |
| Ipamorelin | 75 | Anti-aging and recovery |
| GHK-Cu | 70 | Skin and tissue repair |
Step 1[2]: Wash your hands thoroughly. Use soap and warm water for at least 20 seconds. Dry with a clean towel.
Step 2: Prepare your dose. Draw your prescribed dose into the syringe using the technique your provider showed you. Use the FormBlends to confirm your draw volume. Remove any air bubbles by flicking the syringe and pushing them out.
Free Download: Dose Conversion Table Keep your exact draw amounts at your fingertips. Our dose conversion table covers every common peptide and syringe combination. Get yours free (we'll email it to you instantly. [Download Now]
Step 3: Clean the injection site. Swab the skin with an alcohol pad using a circular motion, starting from the center and working outward. Let it air dry completely) about 30 seconds. Injecting through wet alcohol stings.
Step 4: Pinch the skin. Use your non-dominant hand to pinch a fold of skin at your injection site. Lift the skin about an inch away from the muscle underneath. This creates a clear fat layer for the needle.
Step 5: Insert the needle. Hold the syringe like a pencil or dart in your dominant hand. Insert the needle at a 45 to 90 degree angle into the pinched skin fold. For short needles (6mm), you can go straight in at 90 degrees. For standard 8mm needles, a 45-degree angle helps ensure you stay in the subcutaneous layer.
Insert smoothly and steadily. Don't jab or hesitate halfway in. One fluid motion is less painful.
Step 6: Inject slowly. Depress the plunger steadily over 5 to 10 seconds. Rushing the injection can cause stinging or a bump at the site.
Step 7: Hold and withdraw. After the plunger is fully depressed, hold the needle in place for 5 to 10 seconds. This allows the medication to disperse into the tissue and prevents it from leaking back out. Then withdraw the needle straight out at the same angle you inserted it.
Step 8[7]: Apply light pressure. Press a clean alcohol swab or cotton ball gently on the injection site for a few seconds. Don't rub (rubbing can push the peptide around and cause irritation.
Managing Pain and Discomfort
Most people are surprised by how little a SubQ injection hurts. The insulin needles used for peptides are extremely fine) 30 or 31 gauge (and most of the anxiety comes from anticipation rather than actual sensation.
Check your GLP-1 eligibility
Use our free BMI Calculator to see if you may qualify for provider-reviewed GLP-1 therapy.
Try the BMI Calculator →A few tips to minimize discomfort:
Let the alcohol dry completely. Injecting through wet alcohol is the number one cause of unnecessary stinging.
Use room-temperature solution. If your reconstituted peptide has been refrigerated, let the syringe warm in your hand for a minute or two before injecting. Cold solution can cause a brief burning sensation.
Inject at a consistent speed. Slow and steady pressure on the plunger hurts less than rapid injection. Take 5 to 10 seconds for the full dose.
Relax the injection area. Tense muscles underneath the injection site make things more uncomfortable. If you're injecting in your abdomen, don't flex your abs. If you're injecting in your thigh, sit in a relaxed position.
Rotate sites religiously. Injecting in the same spot repeatedly causes tissue irritation and can make each subsequent injection more painful. The helps you track and rotate.
Numb the area if needed. Some people hold an ice cube on the injection site for 30 seconds before swabbing with alcohol. This temporarily numbs the skin. It's optional and most people find they don't need it after the first few injections.
Common Mistakes to Avoid
Even experienced self-injectors can develop bad habits. Watch out for these common errors.
Forgetting to remove air bubbles. A small air bubble in a SubQ injection isn't dangerous, but it takes up volume in the syringe. If your dose is 10 units and 2 units of that's air, you only got 8 units of peptide. Always expel air before injecting.
Injecting too shallow. If the needle barely enters the skin, the peptide may not reach the subcutaneous layer. You might see a bleb (raised bump) form on the skin surface. If this happens, the peptide may not absorb properly.
Injecting too deep. Going past the fat layer into muscle changes the absorption rate. For SubQ protocols, this matters. Use the right needle length and angle to stay in the fat layer.
Not rotating sites. Repeated injections in one spot cause lipohypertrophy) hardened lumps of fatty tissue. These lumps absorb medication unevenly, making your doses unpredictable. Rotate every injection.
Reusing needles. A used needle is dull, potentially contaminated, and more painful. Always use a new, sterile syringe for each injection. For proper disposal guidance, see our .
For a full overview of your peptide protocol including reconstitution calculator, dosing, and injection, visit our .
Frequently Asked Questions
Does a subcutaneous injection hurt?
Most people describe it as a tiny pinch that lasts less than a second. The 30G and 31G needles used for peptide injections are among the thinnest needles available. After a few injections, most patients say they barely notice it.
How do I know if I injected into the muscle instead of the fat?
If you feel the needle hit something firm or you notice the injection went much deeper than usual, you may have reached the muscle. The dose still absorbs but at a different rate. To avoid this, pinch the skin fold properly and use a 45-degree angle with standard-length needles.
Can I inject my peptide anywhere on my body?
Stick to the recommended sites (abdomen, outer thigh, or back of the upper arm. These areas have consistent subcutaneous fat layers. Avoid areas with visible veins, moles, scars, or inflammation.
What should I do if blood comes out after I remove the needle?
A tiny drop of blood is completely normal and happens occasionally when the needle nicks a small capillary. Press gently with a cotton ball or alcohol swab for 10 to 15 seconds. It doesn't mean the injection failed.
How soon after reconstitution can I inject?
As soon as the powder is fully dissolved and the solution is clear, you can draw your dose and inject. There's no waiting period after reconstitution. Just make sure you store the remaining solution in the refrigerator right away.
What's Your Next Move?
You have the information. Now let a licensed provider help you put it into action. FormBlends makes it simple) answer a few questions and get a personalized recommendation.
Medical References
- Lincoff AM, Brown-Frandsen K, Colhoun HM, et al. Semaglutide and Cardiovascular Outcomes in Obesity without Diabetes. N Engl J Med. 2023;389(24):2221-2232. [PubMed | ClinicalTrials.gov | DOI]
- Wilding JPH, Batterham RL, Calanna S, et al. Once-Weekly Semaglutide in Adults with Overweight or Obesity. N Engl J Med. 2021;384(11):989-1002. [PubMed | ClinicalTrials.gov | DOI]
- Davies M, Færch L, Jeppesen OK, et al. Semaglutide 2.4 mg once a week in adults with overweight or obesity, and type 2 diabetes (STEP 2). Lancet. 2021;397(10278):971-984. [PubMed | ClinicalTrials.gov | DOI]
- Wadden TA, Bailey TS, Billings LK, et al. Effect of Subcutaneous Semaglutide vs Placebo as an Adjunct to Intensive Behavioral Therapy on Body Weight in Adults With Overweight or Obesity (STEP 3). JAMA. 2021;325(14):1403-1413. [PubMed | ClinicalTrials.gov | DOI]
- Rubino D, Abrahamsson N, Davies M, et al. Effect of Continued Weekly Subcutaneous Semaglutide vs Placebo on Weight Loss Maintenance in Adults With Overweight or Obesity (STEP 4). JAMA. 2021;325(14):1414-1425. [PubMed | ClinicalTrials.gov | DOI]
- Garvey WT, Batterham RL, Bhatt DL, et al. Two-year effects of semaglutide in adults with overweight or obesity (STEP 5). Nat Med. 2022;28(10):2083-2091. [PubMed | ClinicalTrials.gov | DOI]
- Rubino DM, Greenway FL, Khalid U, et al. Effect of Weekly Subcutaneous Semaglutide vs Daily Liraglutide on Body Weight in Adults With Overweight or Obesity Without Diabetes (STEP 8). JAMA. 2023;327(2):138-150. [PubMed | ClinicalTrials.gov | DOI]
Sources &. References
- Sikiric P, Hahm KB, Blagaic AB, et al. Stable Gastric Pentadecapeptide BPC 157, Robert's Cytoprotection, Adaptive Cytoprotection, and Therapeutic Effects. Curr Pharm Des. 2018;24(18):1990-2001. Doi:10.2174/1381612824666180515125918
- Chang CH, Tsai WC, Lin MS, et al. The promoting effect of pentadecapeptide BPC 157 on tendon healing involves tendon outgrowth, cell survival, and cell migration. J Appl Physiol. 2011;110(3):774-780. Doi:10.1152/japplphysiol.00945.2010
- Seiwerth S, Brcic L, Vuletic LB, et al. BPC 157 and blood vessels. Curr Pharm Des. 2014;20(7):1121-1125. Doi:10.2174/13816128113199990421
- Bock-Marquette I, Saxena A, White MD, et al. Thymosin beta4 activates integrin-linked kinase and promotes cardiac cell migration, survival and cardiac repair. Nature. 2004;432(7016):466-472. Doi:10.1038/nature03000
- Malinda KM, Sidhu GS, Mani H, et al. Thymosin beta4 accelerates wound healing. J Invest Dermatol. 1999;113(3):364-368. Doi:10.1046/j.1523-1747.1999.00708.x
- Ionescu M, Frohman LA. Pulsatile secretion of growth hormone (GH) persists during continuous stimulation by CJC-1295, a long-acting GH-releasing hormone analog. J Clin Endocrinol Metab. 2006;91(12):4792-4797. Doi:10.1210/jc.2006-1702
This article is for educational purposes only and doesn't constitute medical advice. Always consult with a licensed healthcare provider before starting, changing, or stopping any medication or supplement. FormBlends connects you with licensed providers who can evaluate your individual health needs.
Last updated: 2026-03-24
See your options in about 2 minutes
Take the free quiz and see what fits you. Quick, private, and no commitment to continue.
See my options →